
Adding a Wicker Table to Make a Paper Sculpture Set
It’s no good having a wicker chair without a table, so I also need a table to go along with my “wicker” chair (all made out of paper).
It’s no good having a wicker chair without a table, so I also need a table to go along with my “wicker” chair (all made out of paper). I’ve been working on the table simultaneously with the chair for my upcoming art installation, “Charming Victorian Country Garden Retreat,” at The Mansion at Strathmore in 2020.
For both the table and chair I used a cardboard base made by gluing together many layers to build a strong solid base, using many clamps to glue it together.

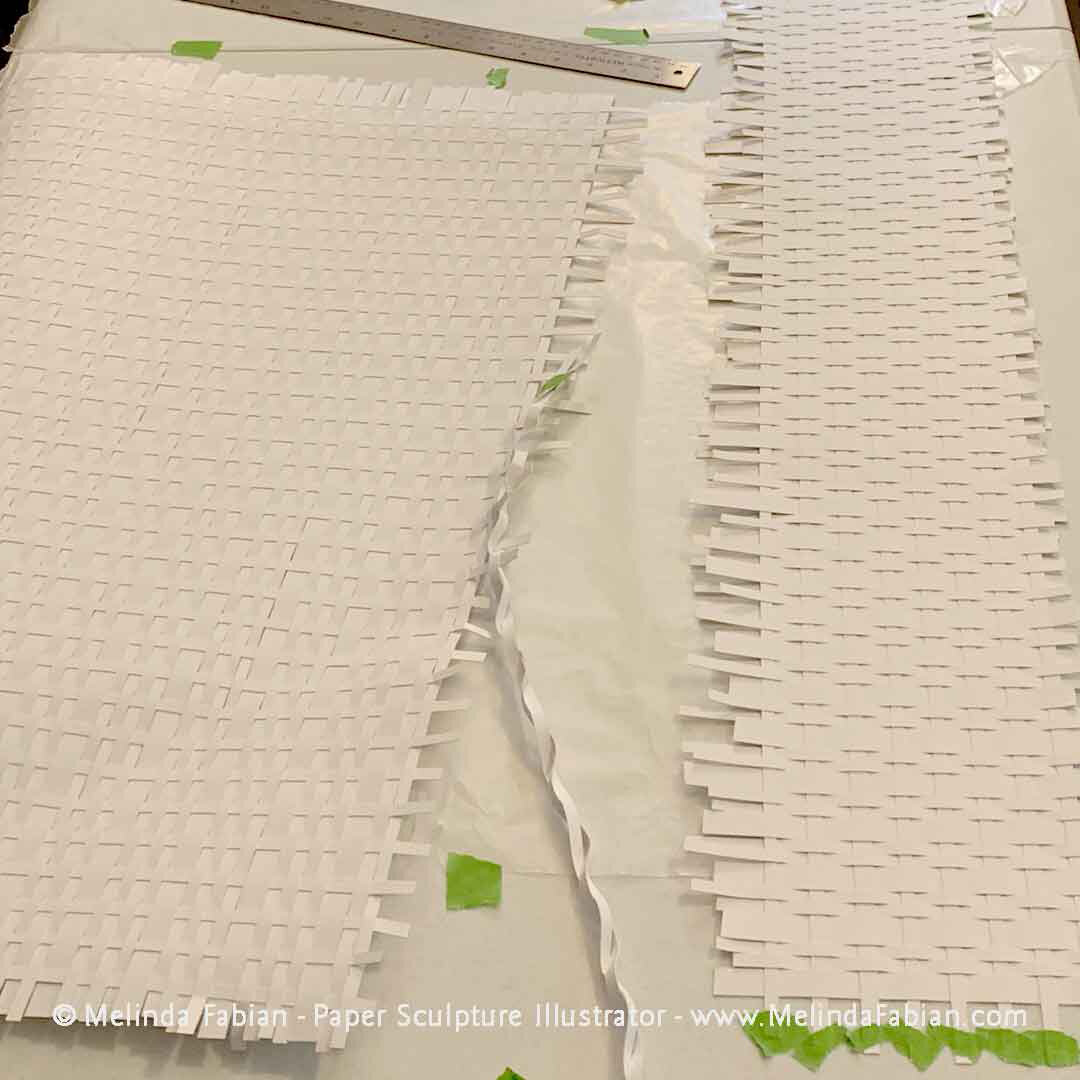
I posted several videos on social media to show how I cut out hundreds of narrow strips of Strathmore paper that I needed to make the table and chair.

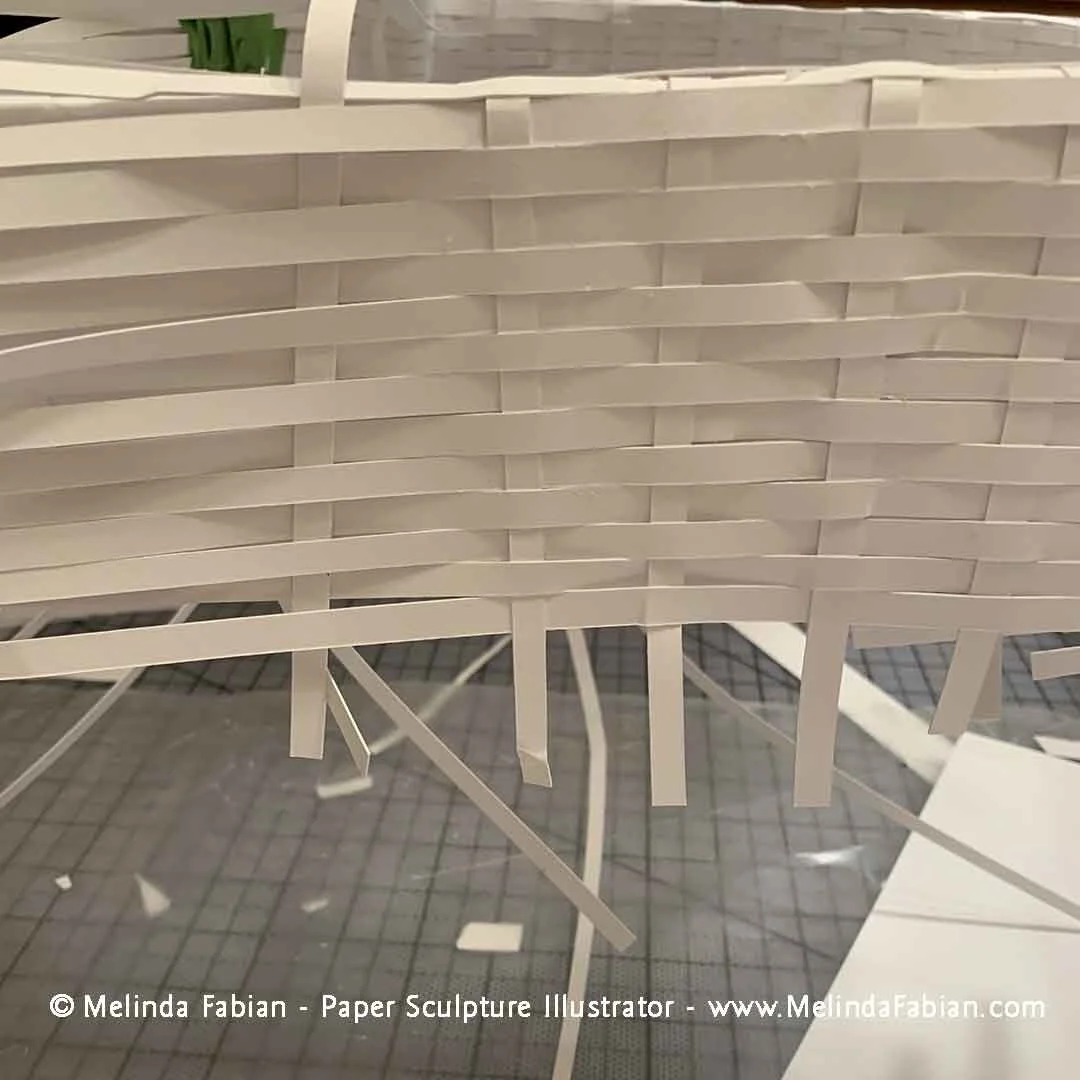
As you can see in this next photo taken during the weaving process on the chair, sometimes I really get into my work. It looks more confusing than it actually is in real life.

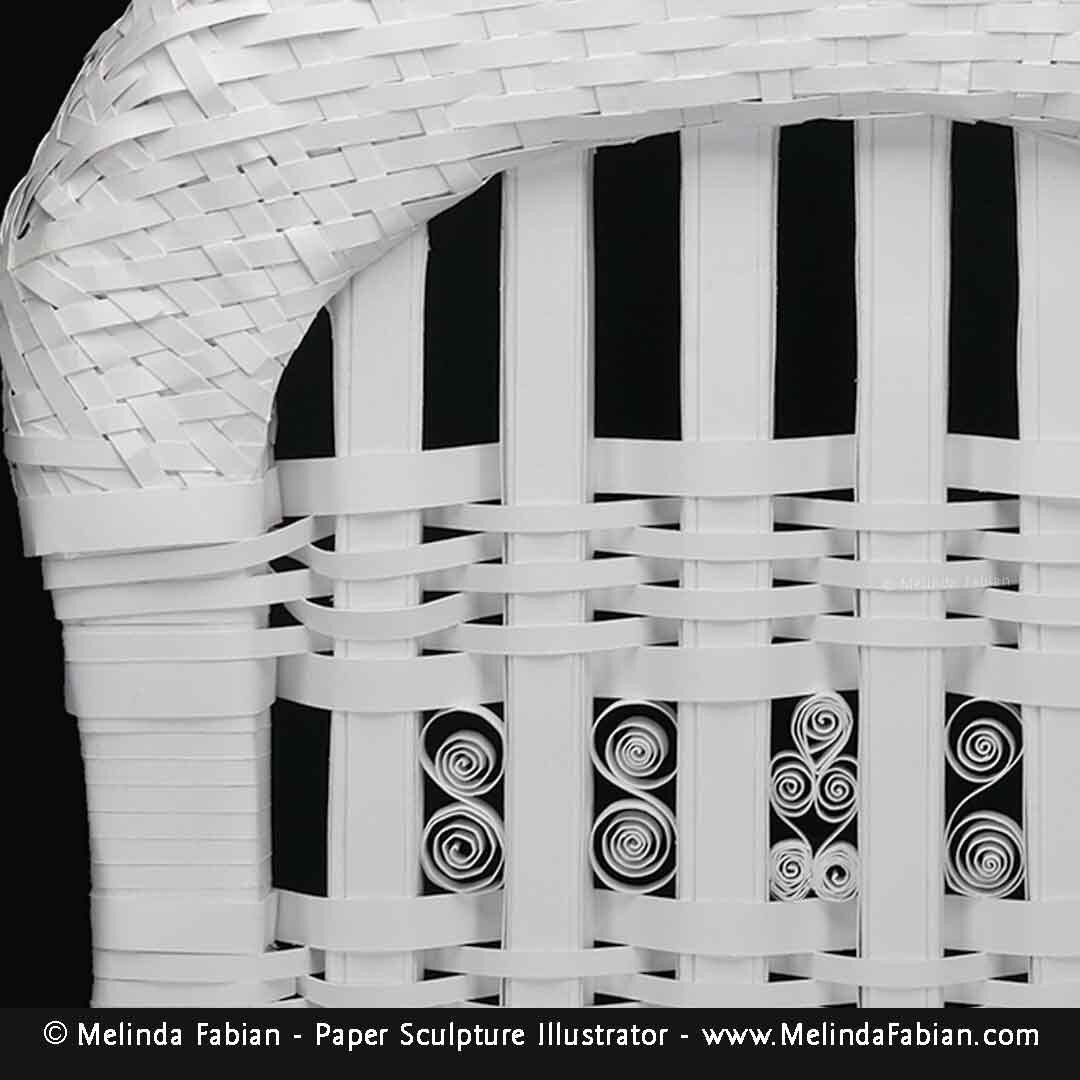
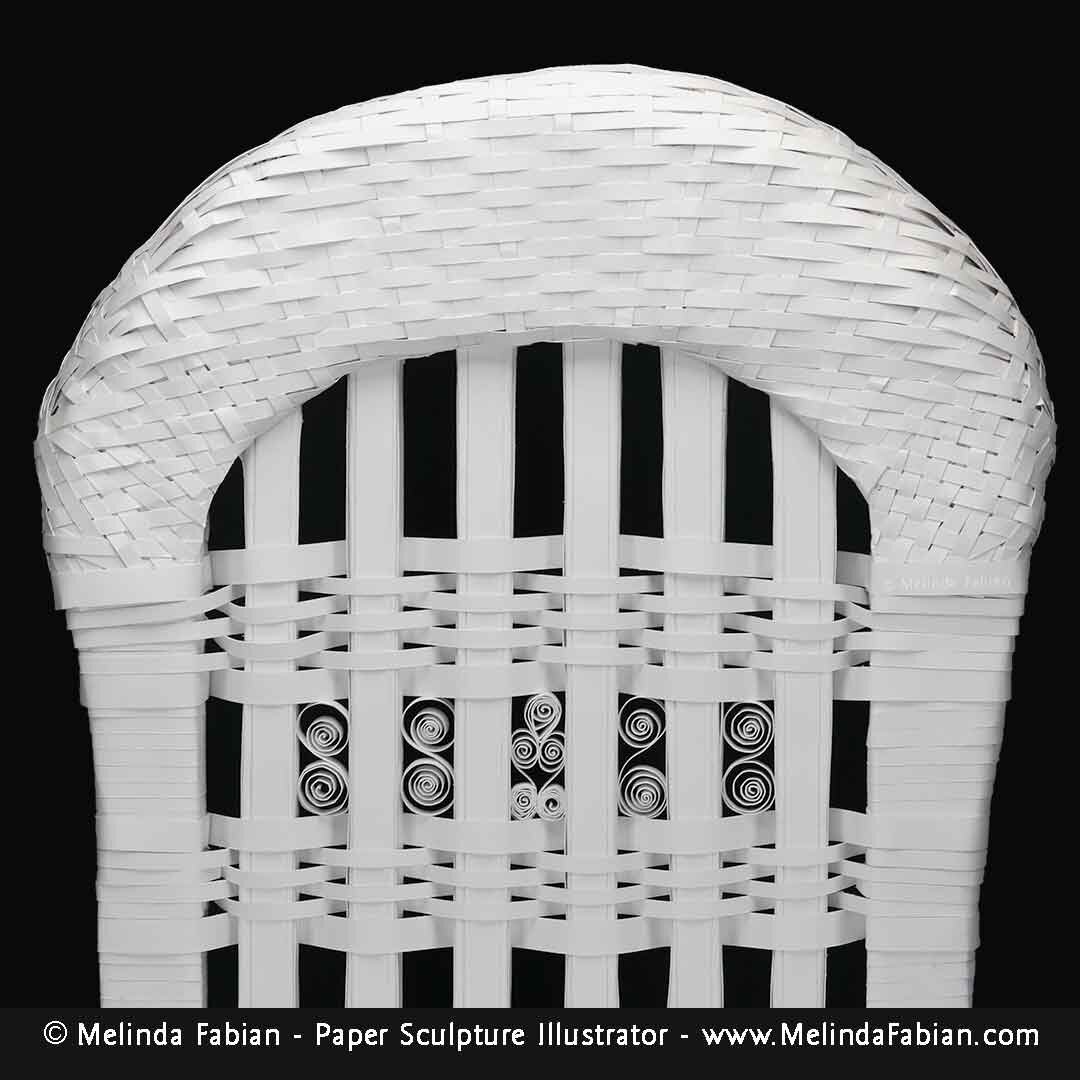
As I was designing my table and chair, I decided to incorporate some scroll work into the design. I want to give the furniture a little more elegant and Victorian flair. I went back to my good old quilling days — I started quilling as a teenager — to add some custom, white scrolls for the finishing touches.
Here are some final in progress photos as the table comes together:

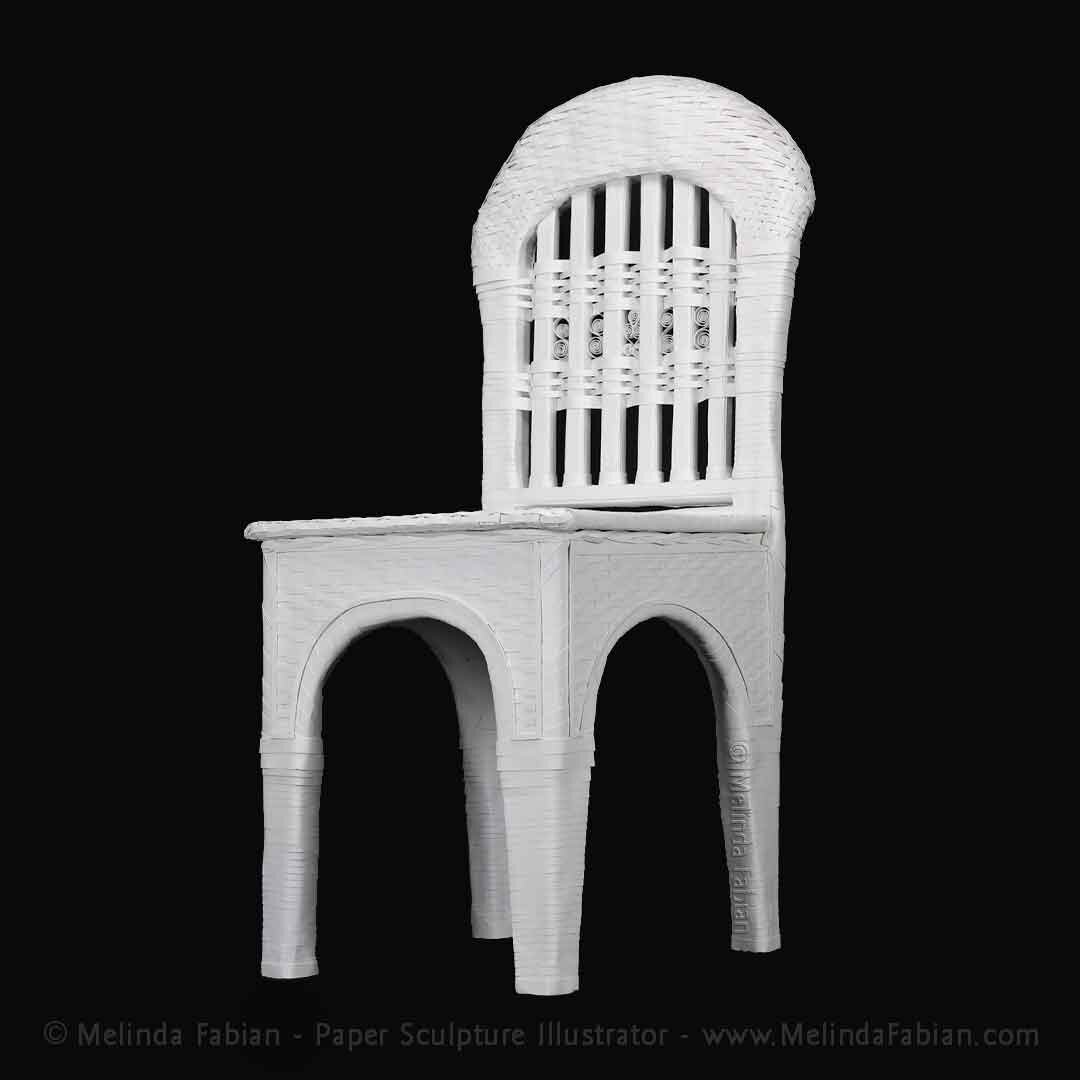
Adding the Final Touches to the Wicker Chair
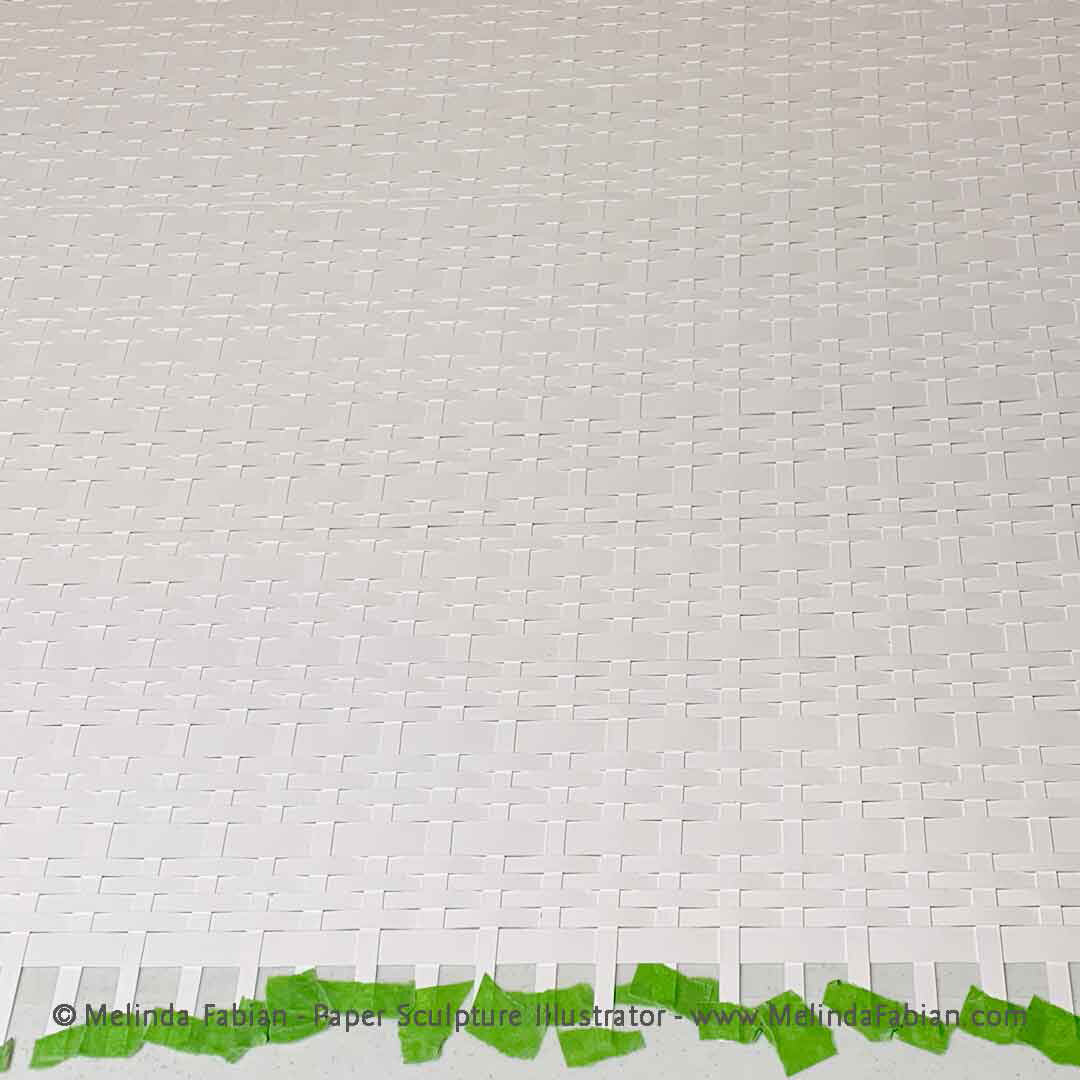
Then it was time to hand-cut narrow strips of white paper for hand-weaving a wicker pattern effect for the chair.
Now that I finished the cardboard structure of the wicker chair I have been working on, the second step was to paint the basic construction white. Having accomplished that, the third step was to cover the chair in plain white Strathmore paper. Once covered in white paper, the chair had a fresh canvas surface to work on. Then it was time to hand-cut narrow strips of white paper for hand-weaving a wicker pattern effect for the chair.
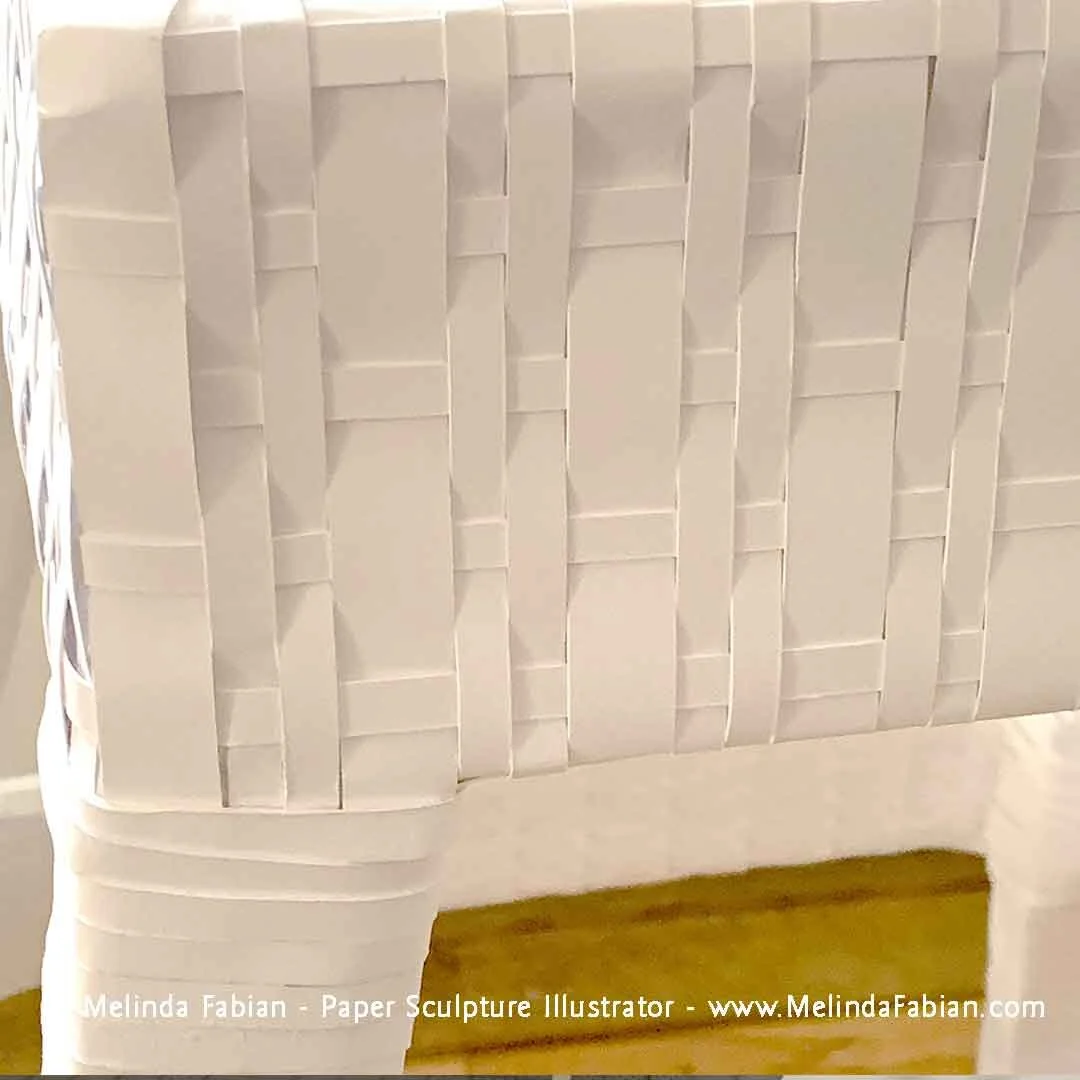
As I was wrapping the legs of the chair and adding woven sections, I realized I wanted to make some design changes as I approached the back of the chair, especially at the top. Originally I was going to only wrap the chair in paper, but decided to include some woven details to a portion of the back of the chair. I also wanted the top arch to be rounded instead of a flat surface.
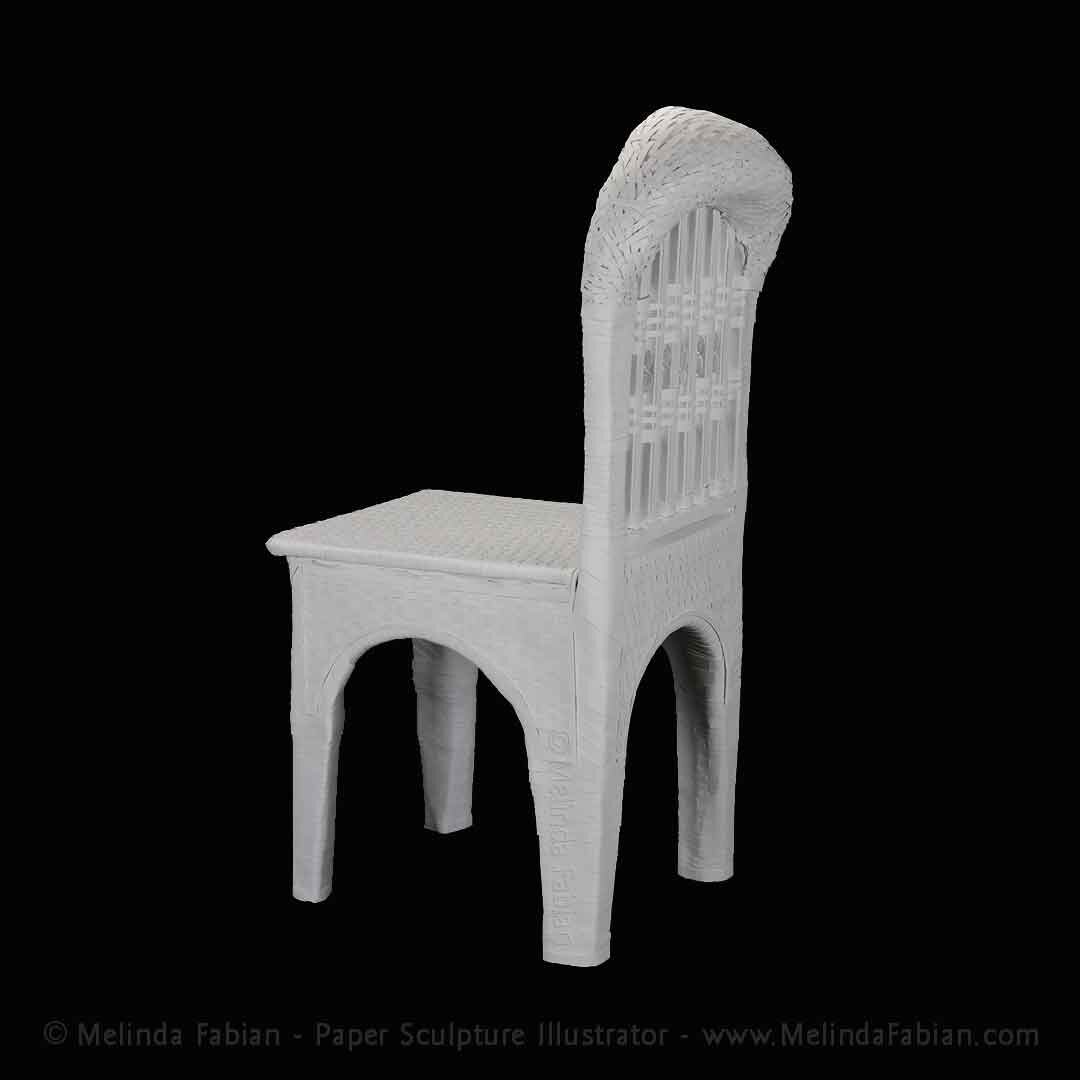
You can see a preview of the final paper sculpture wicker chair here in the photos. The entire chair is finished and ready for the opening of The Mansion at Strathmore in Bethesda, MD!


Creating a Paper Sculpture 'Wicker' Chair Centerpiece
To bring a chair sketch to life, however, required some construction know-how.
One of the larger pieces I am making for my paper sculpture installation for The Mansion at Strathmore in Bethesda, MD, is a “wicker” chair. I researched wicker furniture extensively — I’ve always liked wicker furniture, so the research was like a shopping spree without the purchasing part.
I ended up with an image in mind of how I want the chair to look when it was finished. I also drew up a bunch of different sketches for my chair, keeping in mind the size constraints of my art installation. I need to keep things in proportion to one another. So, with my sketch in hand, and cardboard I saved for months, I was now ready to start the wicker chair.

I wanted to start with a cardboard base because a thicker paper stock can become a solid and sturdy foundation for furniture. (In my 3D design class in college, we had to make furniture out of cardboard. It was quite surprising with how sturdy layers of cardboard can become.)
Even though this chair is for decorative purposes only in the installation, I still need it to be sturdy because it will be transported to the venue and many people may have to move it around. I can’t have this paper sculpture piece being a hollow, fragile chair that falls apart before the show even begins. Plus, I want to recycle as much as possible, and I can make something beautiful out of old cardboard that would otherwise be discarded.
I started measuring the dimensions of various chairs I have around my house — dining room chairs, desk chairs, antique chairs — to come up with the correct size chair I needed to make. Once that was done, I started to cut out cardboard pieces for for the seat, which are easy and rectangular-shaped. The back of the chair with a slight arch was also easy, no problem.

Next, the chair legs, slats for the back of the chair…but wait….how do I assemble all these cardboard pieces? To bring a chair sketch to life, however, required some construction know-how.
So, I knew building little cardboard models of a variety of chair styles would help me to figure out how to complete the project. I had different objectives in mind with these models, and in the end, these funny little chairs helped me to figure out the changes I needed to make to finish constructing the chair.
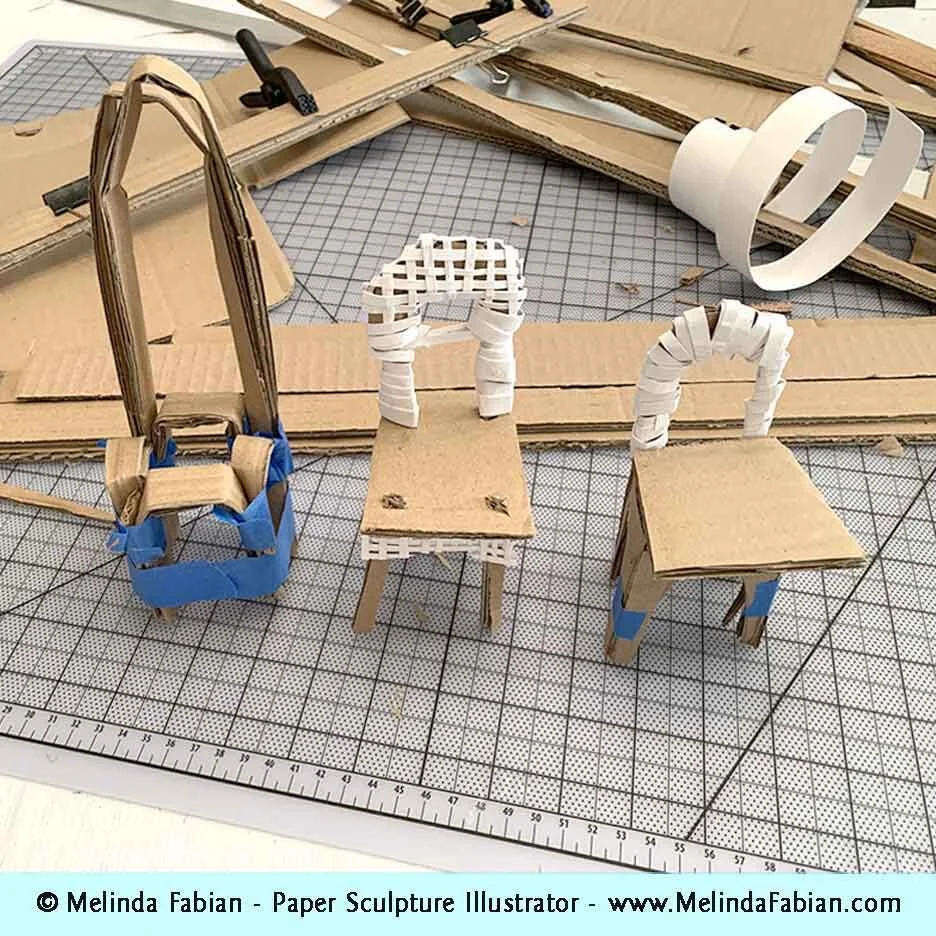
What was the overall lesson I learned from all of this? Constructing something 3D often times requires another step of planning. Building a model can help you confront solvable issues quickly and on a small scale. It can be a crucial step and save countless hours when going from a pencil thumbnail sketch to a 3D object. The extra effort can save you time in the end. And now I’m making good progress on chair construction!


Creature Feature: Playful Squirrel Playing on Wisteria Vines
The squirrel is a three-dimensional paper sculpture made completely out of paper.
Wisteria vines wrapped tightly around each other, growing up a tree, around a fence, back down again to the ground, sprouting up a new shoot. Squirrels scampering over the vines. Bumble bees buzzing in the newly opened spring blossoms. A safe haven for new life in spring — butterflies, praying mantis, and tiny ants — all wanting to call the wisteria their home too.
That’s the scene I am working to capture with this squirrel perched on top of a wisteria vine, part of my upcoming art installation, “Charming Victorian Country Garden Retreat,” at The Mansion at the Strathmore in 2020. This squirrel is ready to check out what is happening below. He’s thrilled it is finally spring — and he’s ready for some new adventures.
The squirrel is a three-dimensional paper sculpture made completely out of paper. Even his tail is made out of paper. The tail is actually the easiest part of making squirrels, and it goes the fastest. It takes many, many hours to apply the paper fur to his face and body, however, which is what took the longest.
After the squirrel is shaped out of paper, he is ready for some paint. He is made out of the finest of white papers and painted in watercolor and gouache.

The wisteria flowers and leaves are also three-dimensional and are hand-cut and sculpted to form the shapes I need to create this beautiful squirrel’s spring habitat he and his other friends in the “Charming Victorian Country Garden Retreat” will also call home.
