
Adding a Wicker Table to Make a Paper Sculpture Set
It’s no good having a wicker chair without a table, so I also need a table to go along with my “wicker” chair (all made out of paper).
It’s no good having a wicker chair without a table, so I also need a table to go along with my “wicker” chair (all made out of paper). I’ve been working on the table simultaneously with the chair for my upcoming art installation, “Charming Victorian Country Garden Retreat,” at The Mansion at Strathmore in 2020.
For both the table and chair I used a cardboard base made by gluing together many layers to build a strong solid base, using many clamps to glue it together.

I posted several videos on social media to show how I cut out hundreds of narrow strips of Strathmore paper that I needed to make the table and chair.
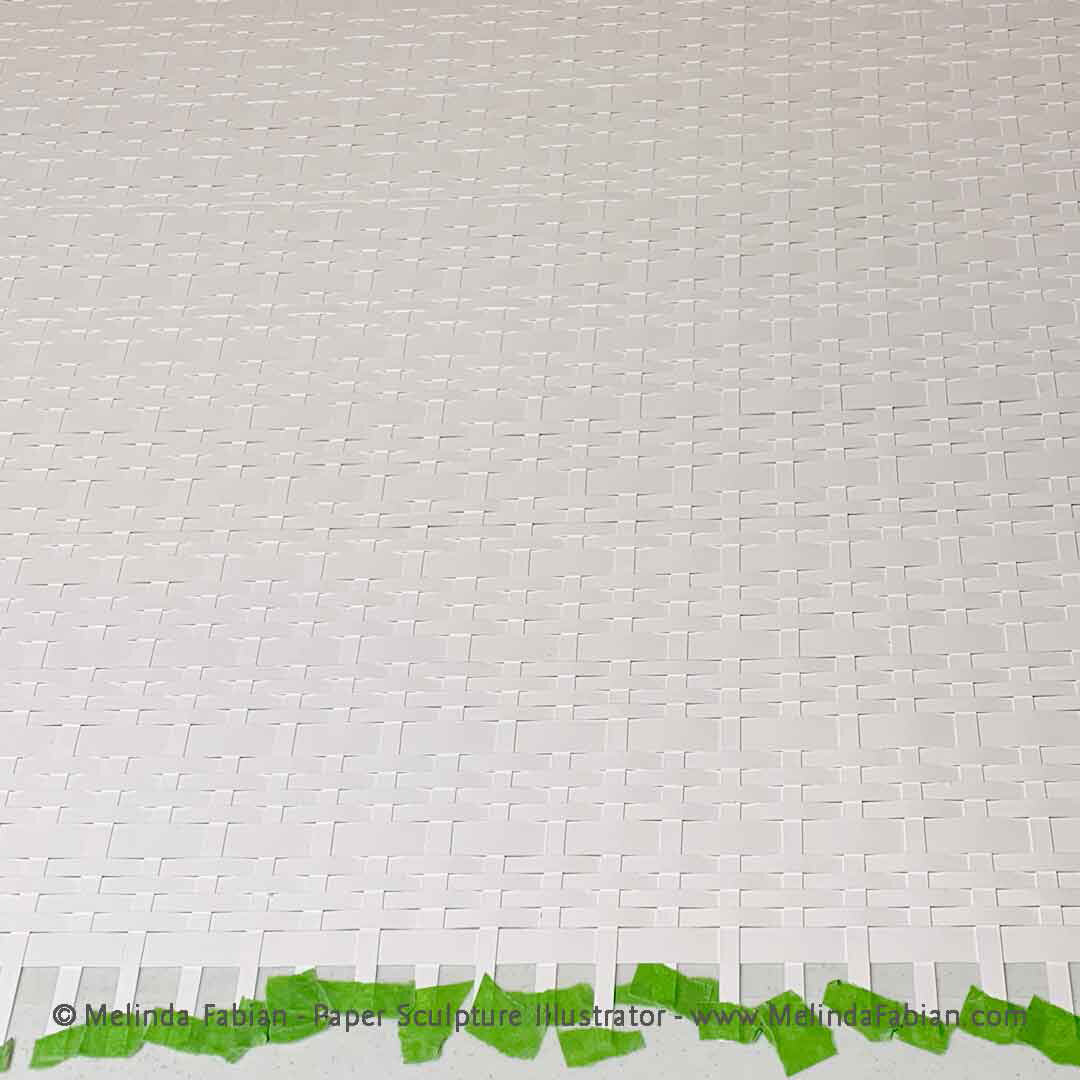

As you can see in this next photo taken during the weaving process on the chair, sometimes I really get into my work. It looks more confusing than it actually is in real life.

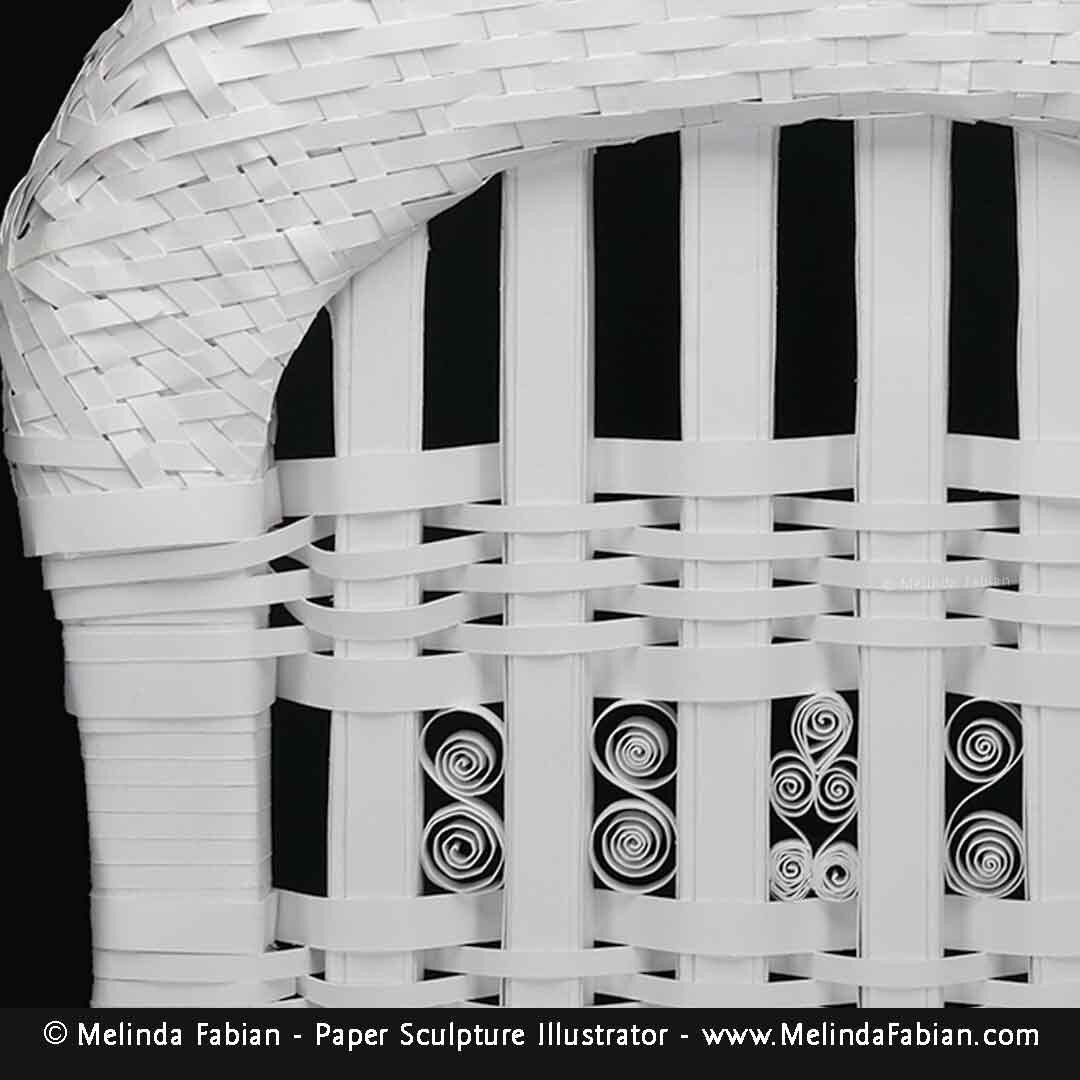
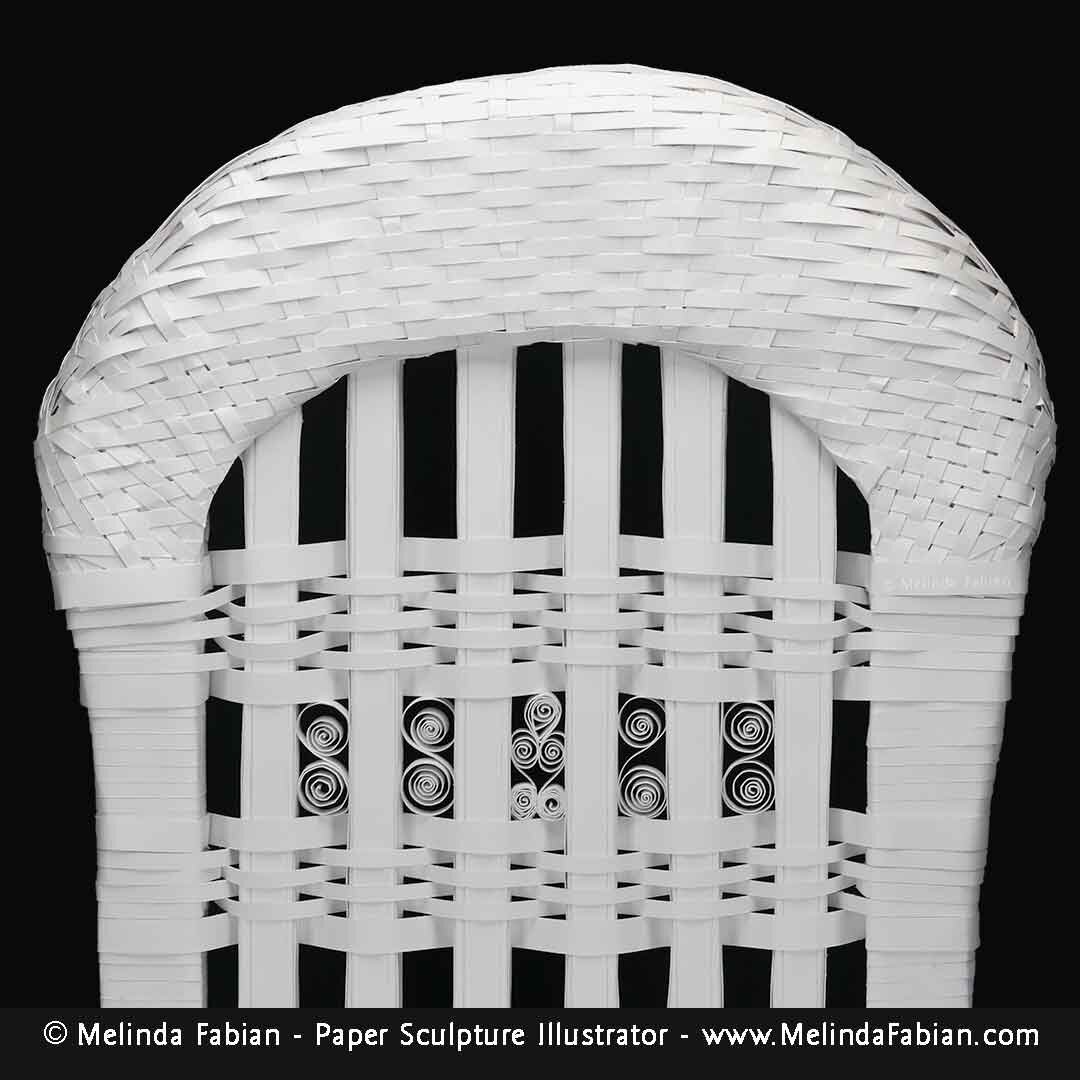
As I was designing my table and chair, I decided to incorporate some scroll work into the design. I want to give the furniture a little more elegant and Victorian flair. I went back to my good old quilling days — I started quilling as a teenager — to add some custom, white scrolls for the finishing touches.
Here are some final in progress photos as the table comes together:

Adding the Final Touches to the Wicker Chair
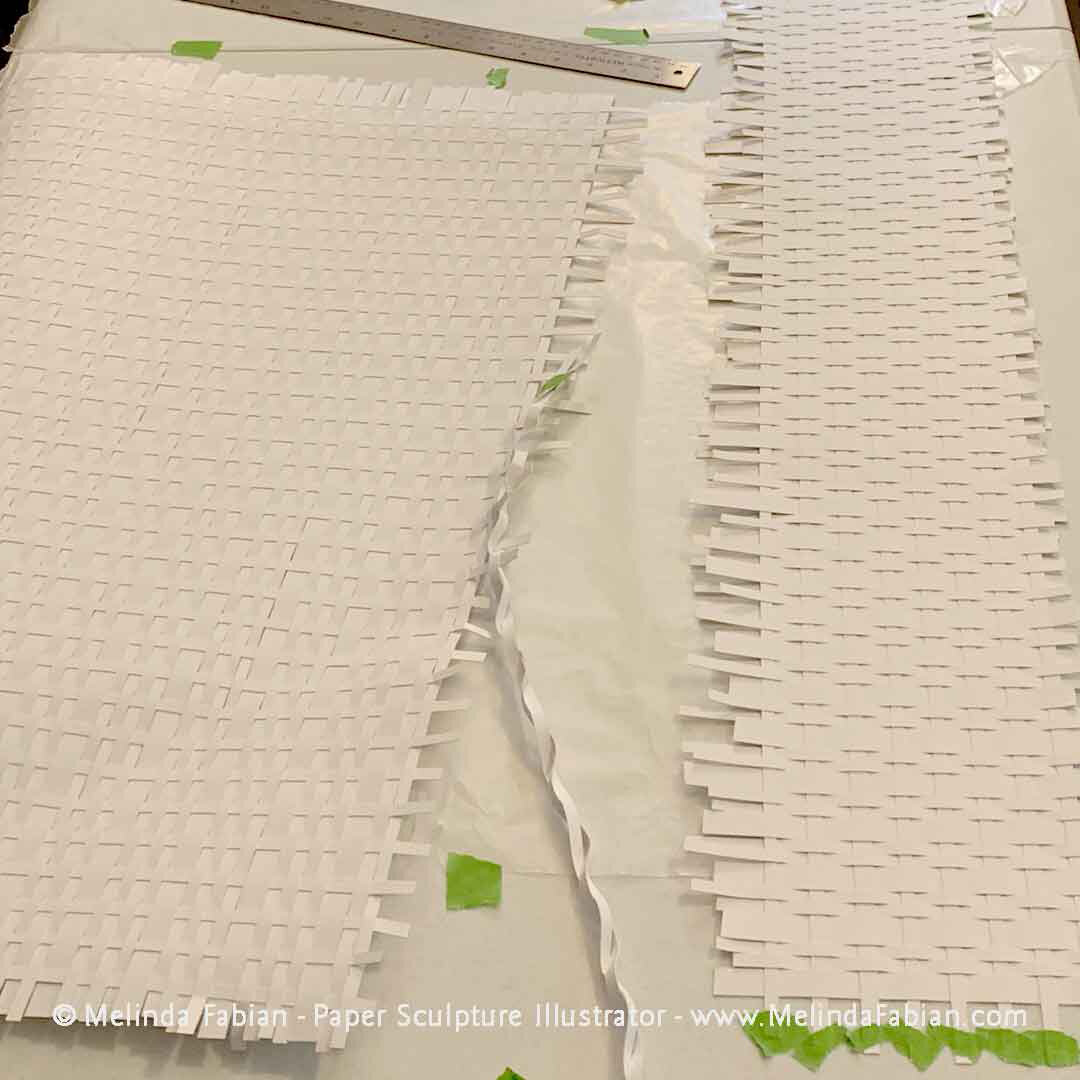
Then it was time to hand-cut narrow strips of white paper for hand-weaving a wicker pattern effect for the chair.
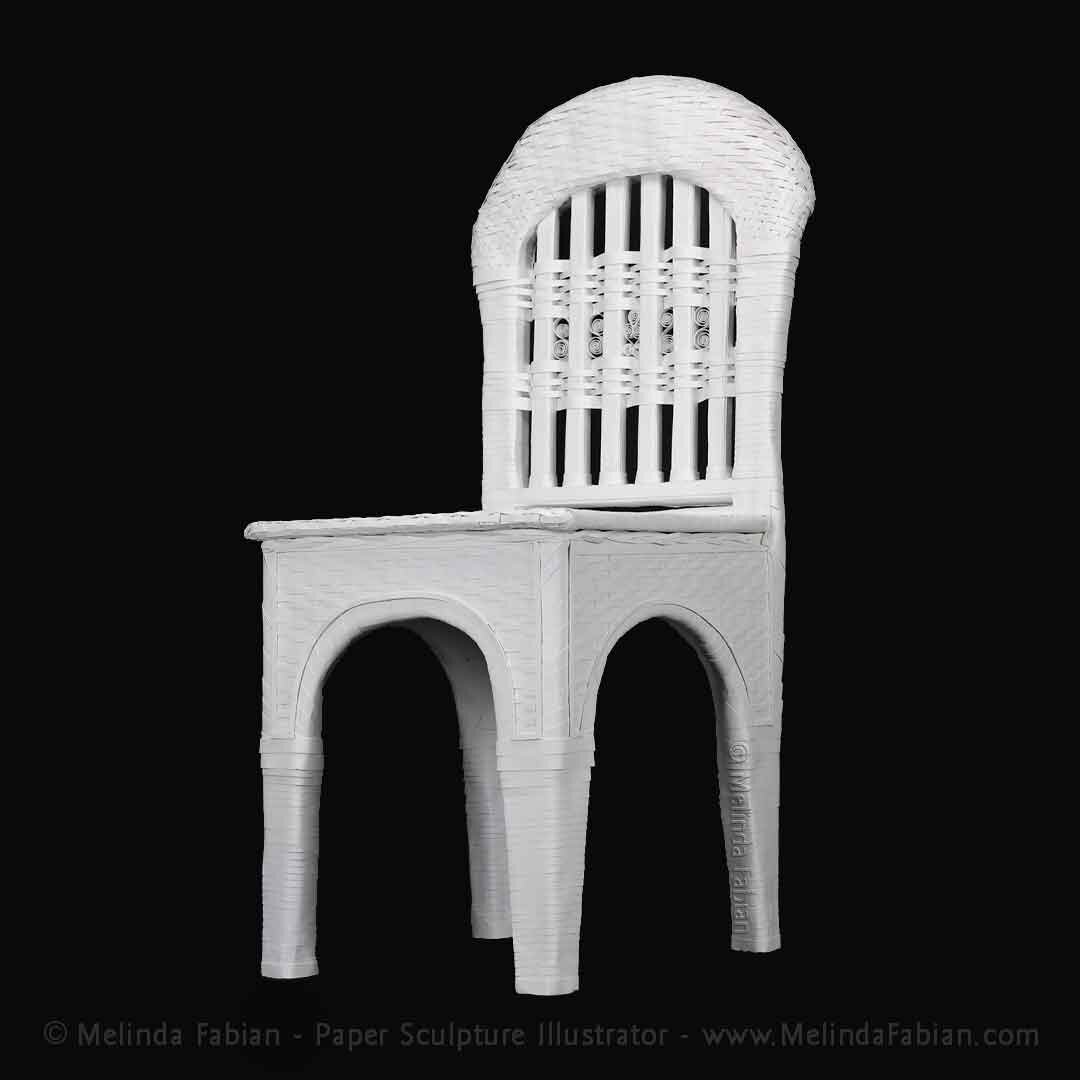
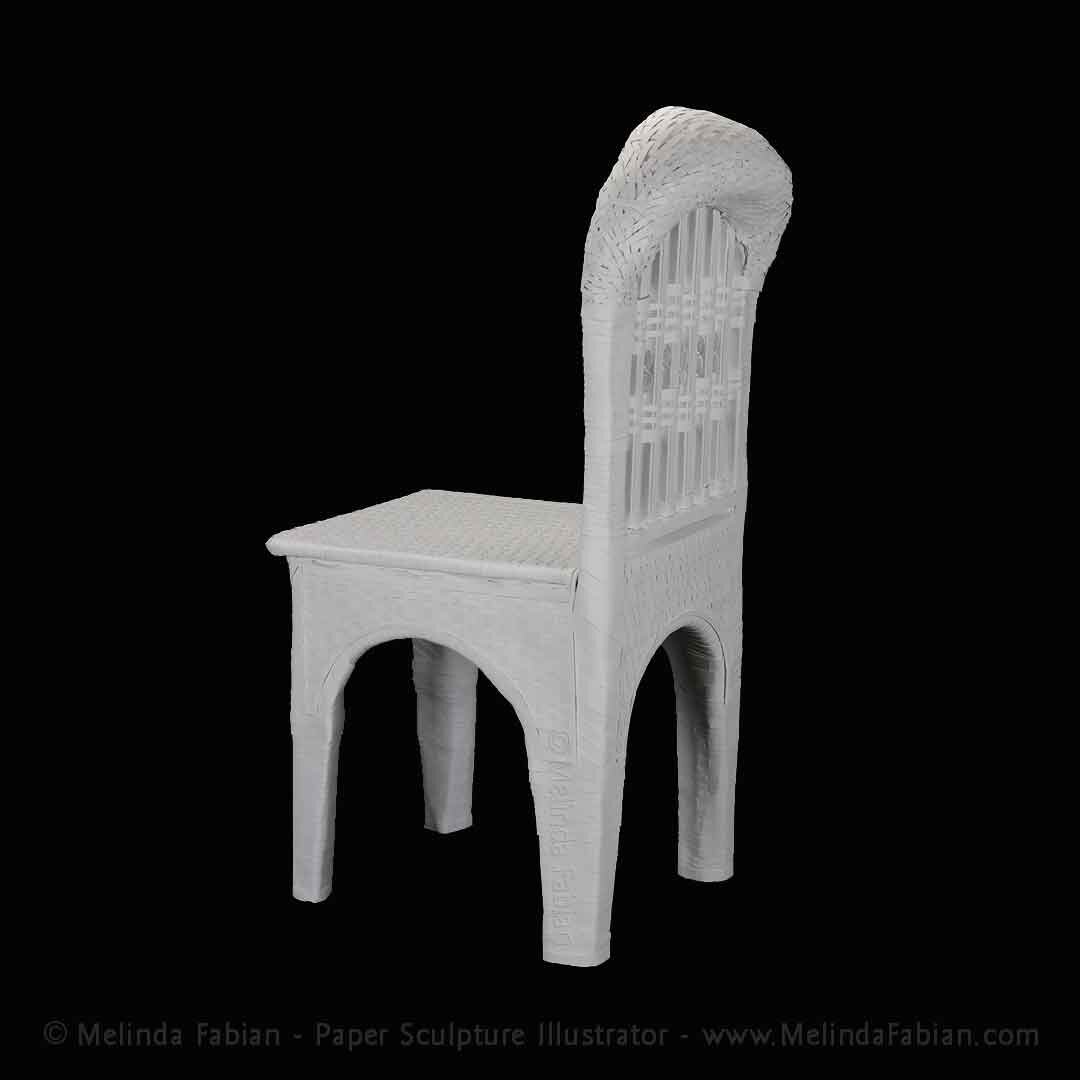
Now that I finished the cardboard structure of the wicker chair I have been working on, the second step was to paint the basic construction white. Having accomplished that, the third step was to cover the chair in plain white Strathmore paper. Once covered in white paper, the chair had a fresh canvas surface to work on. Then it was time to hand-cut narrow strips of white paper for hand-weaving a wicker pattern effect for the chair.
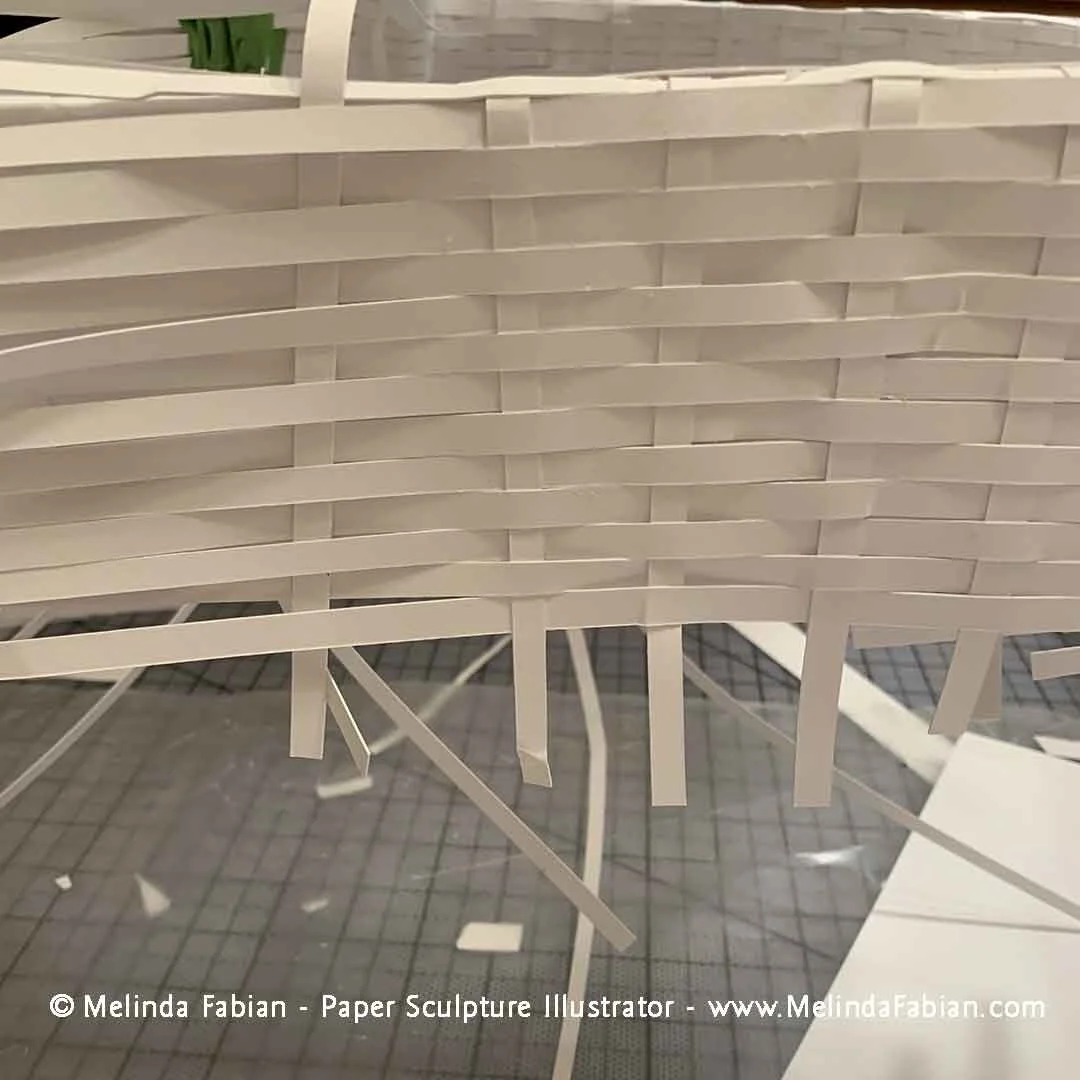
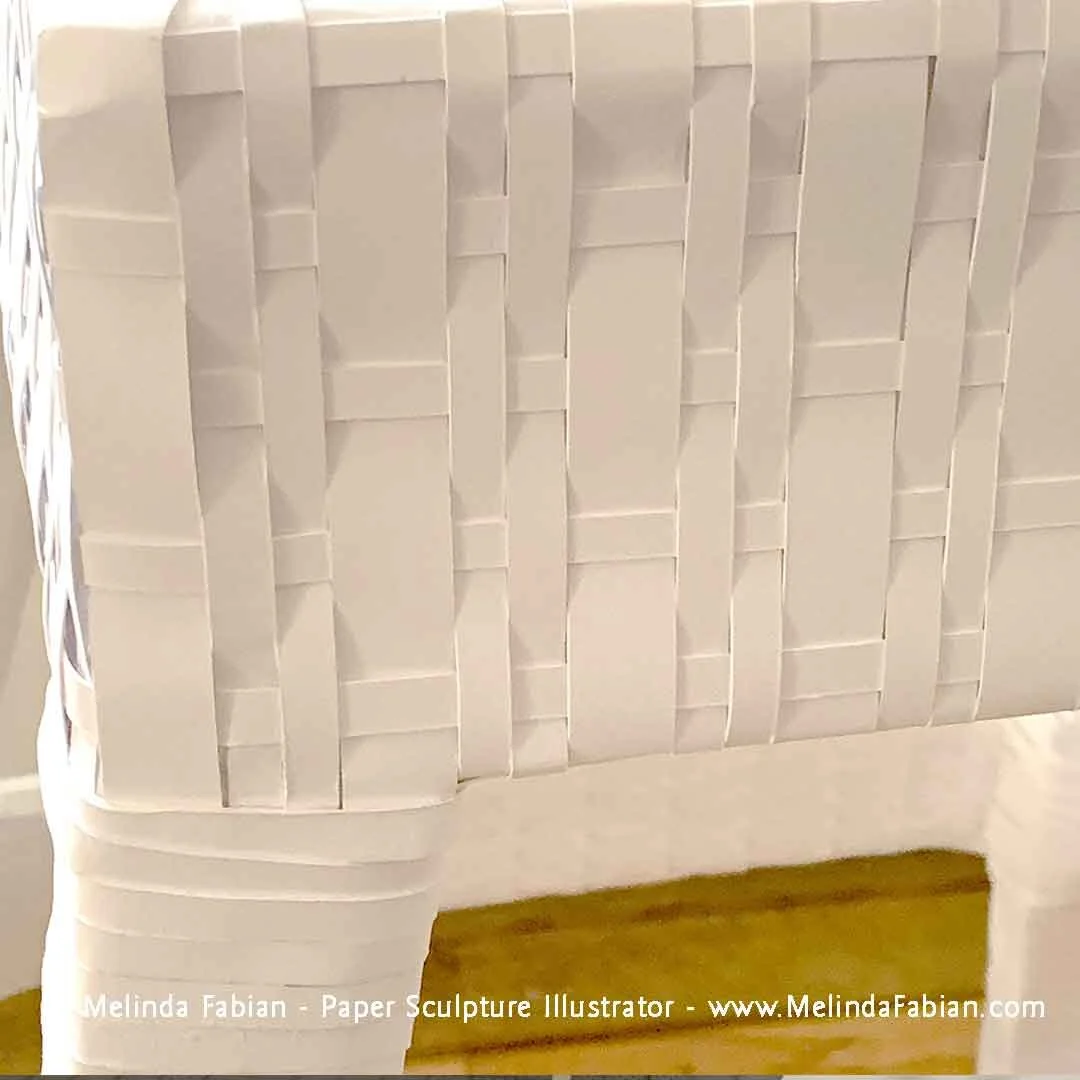
As I was wrapping the legs of the chair and adding woven sections, I realized I wanted to make some design changes as I approached the back of the chair, especially at the top. Originally I was going to only wrap the chair in paper, but decided to include some woven details to a portion of the back of the chair. I also wanted the top arch to be rounded instead of a flat surface.
You can see a preview of the final paper sculpture wicker chair here in the photos. The entire chair is finished and ready for the opening of The Mansion at Strathmore in Bethesda, MD!


Creating a Paper Sculpture 'Wicker' Chair Centerpiece
To bring a chair sketch to life, however, required some construction know-how.
One of the larger pieces I am making for my paper sculpture installation for The Mansion at Strathmore in Bethesda, MD, is a “wicker” chair. I researched wicker furniture extensively — I’ve always liked wicker furniture, so the research was like a shopping spree without the purchasing part.
I ended up with an image in mind of how I want the chair to look when it was finished. I also drew up a bunch of different sketches for my chair, keeping in mind the size constraints of my art installation. I need to keep things in proportion to one another. So, with my sketch in hand, and cardboard I saved for months, I was now ready to start the wicker chair.

I wanted to start with a cardboard base because a thicker paper stock can become a solid and sturdy foundation for furniture. (In my 3D design class in college, we had to make furniture out of cardboard. It was quite surprising with how sturdy layers of cardboard can become.)
Even though this chair is for decorative purposes only in the installation, I still need it to be sturdy because it will be transported to the venue and many people may have to move it around. I can’t have this paper sculpture piece being a hollow, fragile chair that falls apart before the show even begins. Plus, I want to recycle as much as possible, and I can make something beautiful out of old cardboard that would otherwise be discarded.
I started measuring the dimensions of various chairs I have around my house — dining room chairs, desk chairs, antique chairs — to come up with the correct size chair I needed to make. Once that was done, I started to cut out cardboard pieces for for the seat, which are easy and rectangular-shaped. The back of the chair with a slight arch was also easy, no problem.

Next, the chair legs, slats for the back of the chair…but wait….how do I assemble all these cardboard pieces? To bring a chair sketch to life, however, required some construction know-how.
So, I knew building little cardboard models of a variety of chair styles would help me to figure out how to complete the project. I had different objectives in mind with these models, and in the end, these funny little chairs helped me to figure out the changes I needed to make to finish constructing the chair.
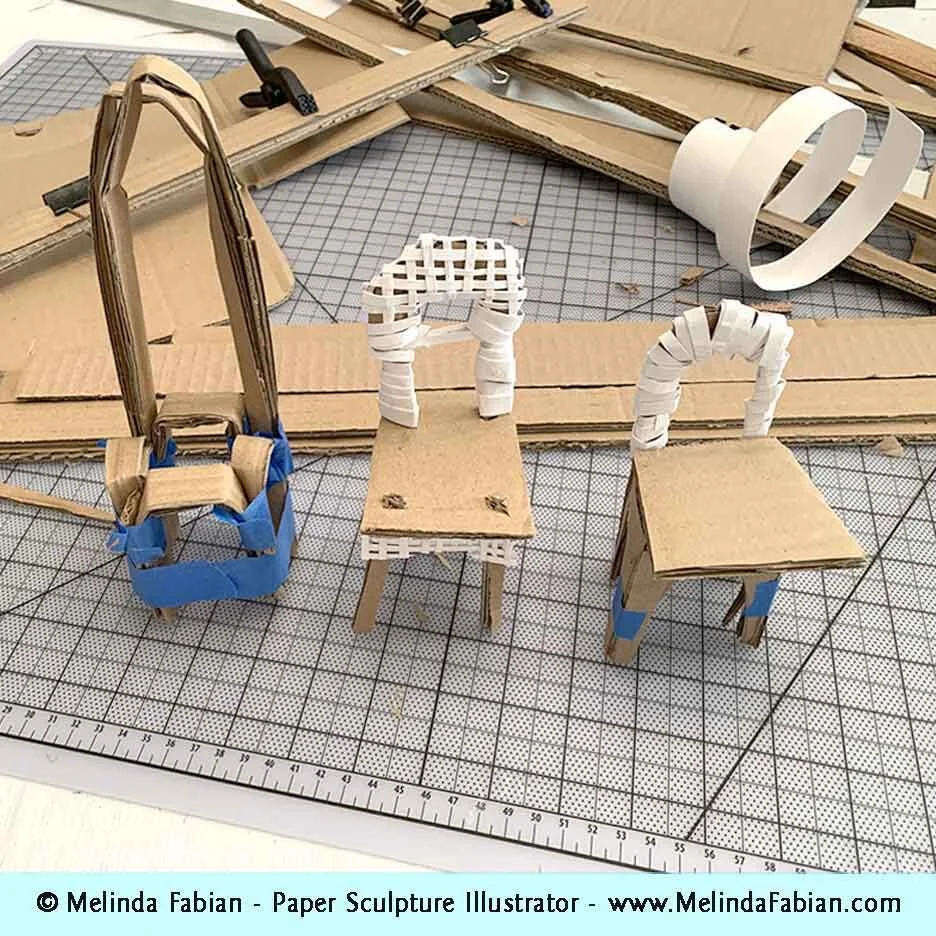
What was the overall lesson I learned from all of this? Constructing something 3D often times requires another step of planning. Building a model can help you confront solvable issues quickly and on a small scale. It can be a crucial step and save countless hours when going from a pencil thumbnail sketch to a 3D object. The extra effort can save you time in the end. And now I’m making good progress on chair construction!


Creature Feature: Playful Squirrel Playing on Wisteria Vines
The squirrel is a three-dimensional paper sculpture made completely out of paper.
Wisteria vines wrapped tightly around each other, growing up a tree, around a fence, back down again to the ground, sprouting up a new shoot. Squirrels scampering over the vines. Bumble bees buzzing in the newly opened spring blossoms. A safe haven for new life in spring — butterflies, praying mantis, and tiny ants — all wanting to call the wisteria their home too.
That’s the scene I am working to capture with this squirrel perched on top of a wisteria vine, part of my upcoming art installation, “Charming Victorian Country Garden Retreat,” at The Mansion at the Strathmore in 2020. This squirrel is ready to check out what is happening below. He’s thrilled it is finally spring — and he’s ready for some new adventures.
The squirrel is a three-dimensional paper sculpture made completely out of paper. Even his tail is made out of paper. The tail is actually the easiest part of making squirrels, and it goes the fastest. It takes many, many hours to apply the paper fur to his face and body, however, which is what took the longest.
After the squirrel is shaped out of paper, he is ready for some paint. He is made out of the finest of white papers and painted in watercolor and gouache.

The wisteria flowers and leaves are also three-dimensional and are hand-cut and sculpted to form the shapes I need to create this beautiful squirrel’s spring habitat he and his other friends in the “Charming Victorian Country Garden Retreat” will also call home.


Melinda Fabian Set as Featured Artist at Strathmore Paper Works Show
BIG news! I will be the featured artist at the upcoming Paper Works art show at The Mansion at Strathmore this summer, where I will exhibit an 18-foot paper sculpture titled, “Charming Victorian Country Garden Retreat.”
BIG news! I will be the featured artist at the upcoming Paper Works art show at The Mansion at Strathmore this fall, where I will exhibit an 18-foot paper sculpture titled, “Charming Victorian Country Garden Retreat.”
Created out of paper and paint, it is my hope this full-scale paper sculpture experience will remind us of the importance of creating real spaces in our lives that can be our safe haven — places that are meaningful, relaxing, rejuvenating and enjoyable. Here are just some of the surprises you can expect to find in this “Charming Victorian Country Garden Retreat”:
Visitors are welcomed into the serene retreat with beautiful garden, framed by exquisite, life-like hanging purple wisteria flowers while squirrels scamper over the vines. Tulips, peonies and iris flowers line the front porch of a Victorian country home, providing a retreat for birds and butterflies too. The wicker table and chair on the front porch overlook the rose gardens while the family dog and kittens play nearby.
You can also count the ladybugs and look for hidden creatures, such as a chipmunk, praying mantis, bees and a leaf hopper. This paper habitat can just about come alive with just a little imagination. Close your eyes for a moment and you can almost smell the flowers, hear the birds chirping and feel the sunshine on your face. By the time you’ve had a good look around, I hope you’ll realize just how life-like paper sculpture can be.
I've already been hard at work for months bringing to life a realistic paper sculpture like you've never seen before, and I can't wait for you to see the completed piece. In the meantime, you can follow the journey on my blog and social media accounts and subscribe to my newsletter to be the first to get new updates!
The show will run at The Mansion at Strathmore in Bethesda, Maryland, from Sept. 8 through Oct. 30, 2020. More details to be announced soon!
Updated Aug. 5, 2020.

Creating Custom Paper Sculpture Letters as One-of-a-Kind Keepsakes
When I was designing the letters, I intentionally made them so that each one could be used individually, framed and sold separately to display on a shelf or to hang on a wall.
This Letter ‘E’ and the letter ‘R’ were both originally designed as a part of my logo that spells out the word “PAPER.”

But, when I was designing the letters, I intentionally made them so that each one could be used individually, framed and sold separately to display on a shelf or to hang on a wall.
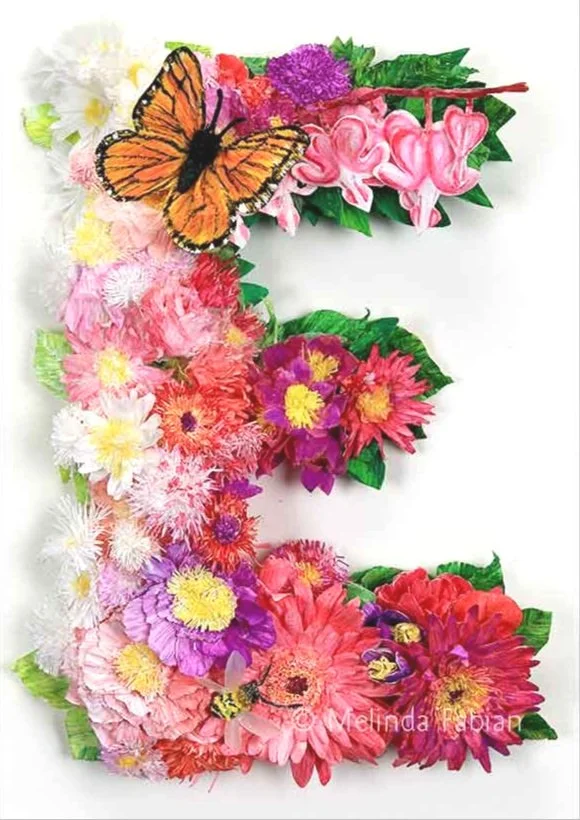
The letter ‘E’ is made up of a colorful array of flowers with a butterfly and a little bee on it. It is a beautiful way to highlight one of your initials. To make up this Letter ‘E,’ I individually cut by hand each little flower.

After the flower is cut out, I then paint it in watercolor and gouache. This letter ‘E’ contains over 50 hand-cut and hand-painted flowers. Each petal is individually cut by hand, glued together to form the flower and then painted. The butterfly is “flying” just above the flowers, looking like it is about to land. The little bee in the bottom left hand corner is very busy checking out the gorgeous pink gerbera daisy.
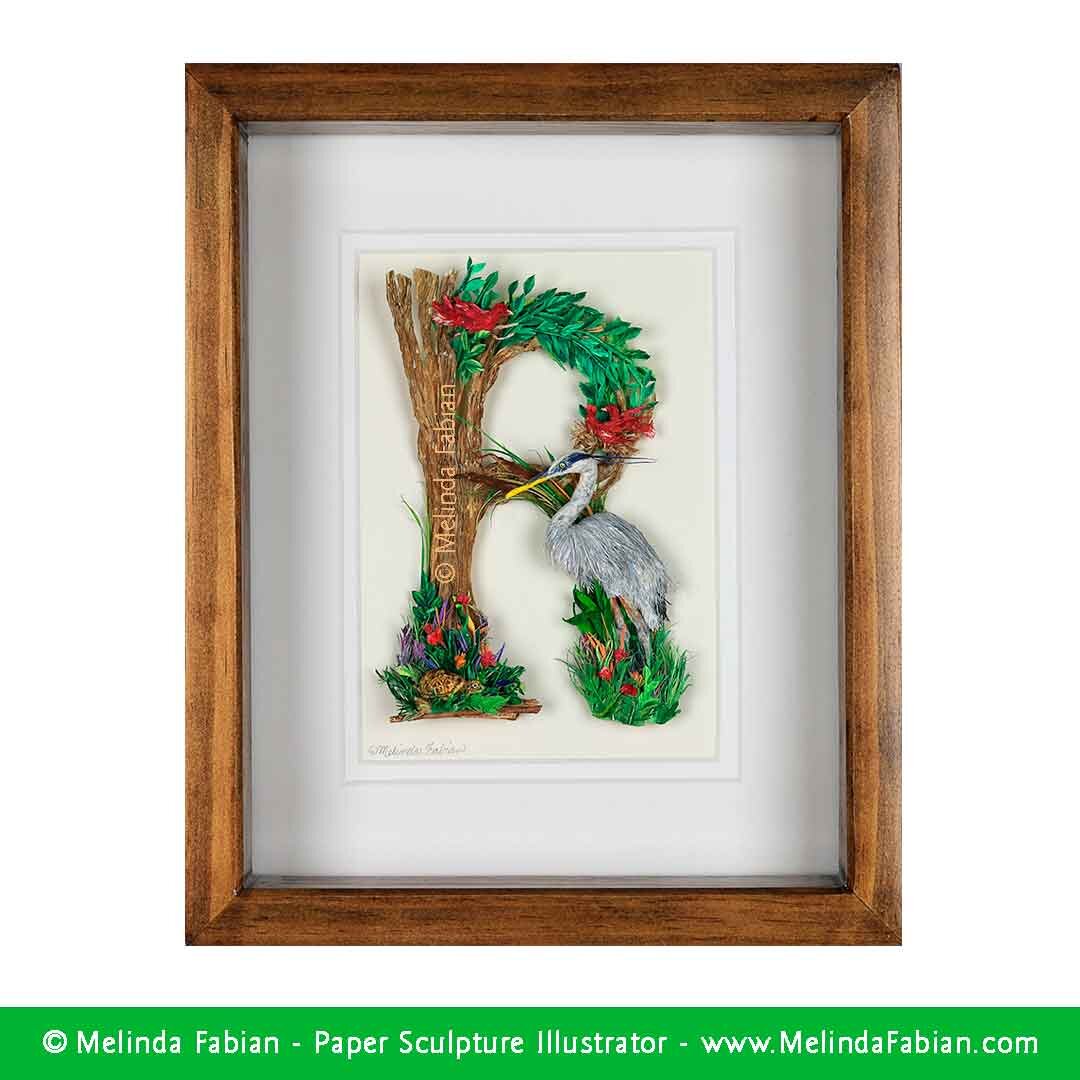
For the letter ‘R,’ I wanted to highlight a bird in honor of a close friend of mine who enjoys taking bird photos. No matter where he goes he manages to find a bird to photograph — even when no one else can even see any wildlife in the vicinity, he will find one!
For this letter, I chose a blue heron, since they are also a very popular bird in my home state of Maryland. Here is just one of my friend’s many reference photos he generously let me use to make this tall, statuesque bird.

This letter ‘R’ was a little trickier to make than the flowery letter ‘E.’ Flowers can pretty easily transform into any of the letters of the alphabet. On the other hand, the blue heron and the tree shape had to conform to the shape of the letter ‘R.’ I added a couple of other birds in the tree and a cute little box turtle is sitting at the base of the tree on the left-hand side.

This three-dimensional letter is all made out of paper. I included a behind-the-scenes photo of the hand-drawn letters and you can also see the blue heron, all in white, before he got painted in watercolor and gouache.

Both letters are framed inside a custom wood shadowbox frame. The frame measures 10.75” L x 9” W x 2.5” D. Please contact Melinda Fabian if you would like to purchase either of the framed letters.
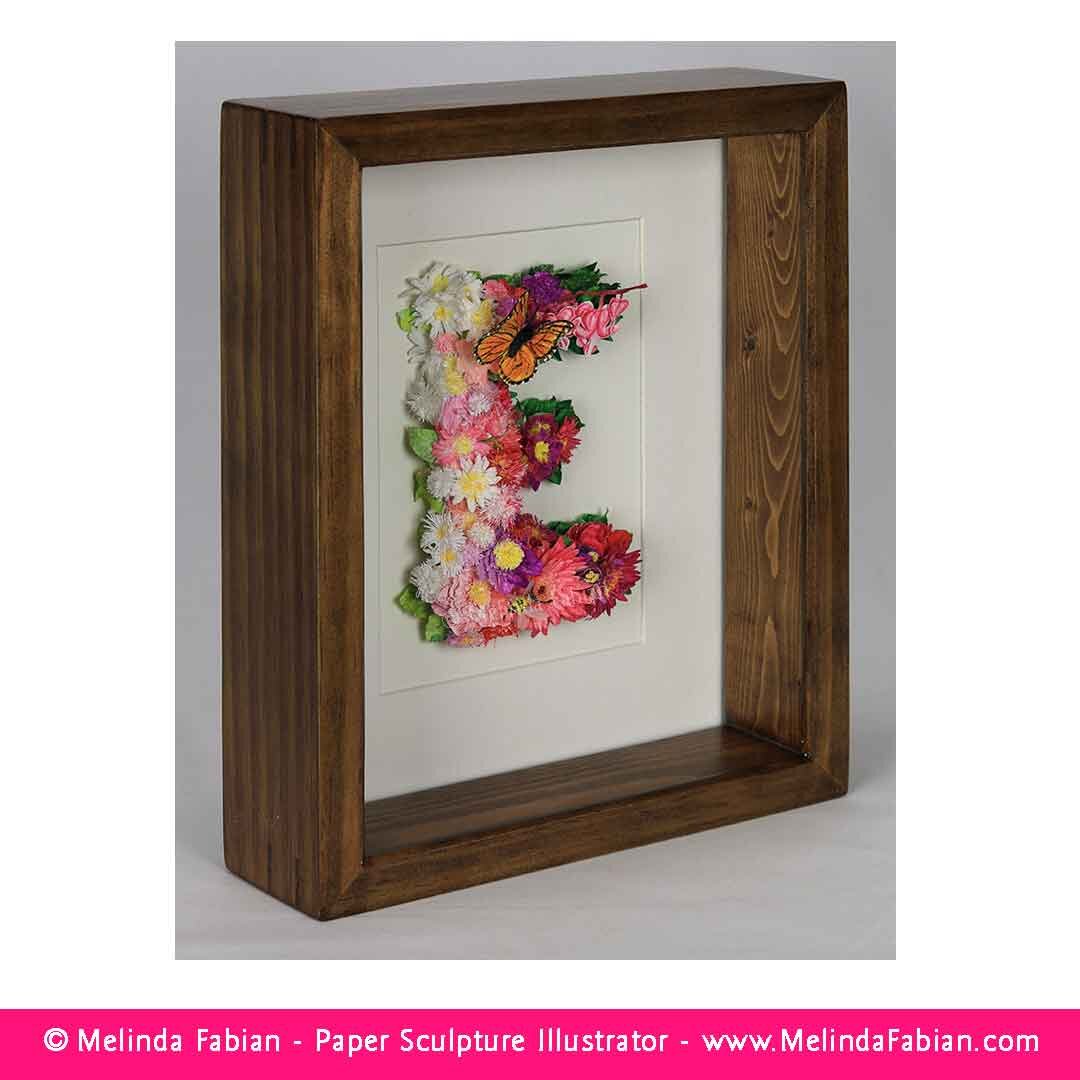
You can also custom order a personalized letter, which can include items that are important to you or your loved one, if you’d like to give it as a gift. Send me an email at melinda@MelindaFabian.com to discuss your custom letter initial.

Turning a Cat Nap Into a Work of Art
When you see a sweet little cat nap, don’t you wish it could be you, sleeping peacefully at 2 in the afternoon?
When you see a sweet little cat nap, don’t you wish it could be you, sleeping peacefully at 2 in the afternoon? Life of a house cat. The only thing he has to worry about is, “When can I take another nap?” and “When is supper time?”
Those were a few of the things I was thinking about when I was painting this orange tabby cat sleeping peacefully in his favorite, blue-stuffed chair, not a care in the world!
This sleepy tabby is a flat, two-dimensional watercolor and gouache painting with a few three-dimensional elements added to the picture. His furry ear is popping out of the paper, and his whiskers and a few bits of fur here and there gives him some added 3D effect.


Celebrating Fall With a Trio of Paper-Sculpted Gourds
This trio of gourds was a fun project to do. I wanted them to look as realistic as possible.
Sometimes I like the challenge of creating something as realistically as I possibly can out of paper. While visiting a local farm, I discovered so many interesting gourds in all different sizes and shapes. Of course I thought — that’s it! A great idea for a photo-realistic paper sculpture.
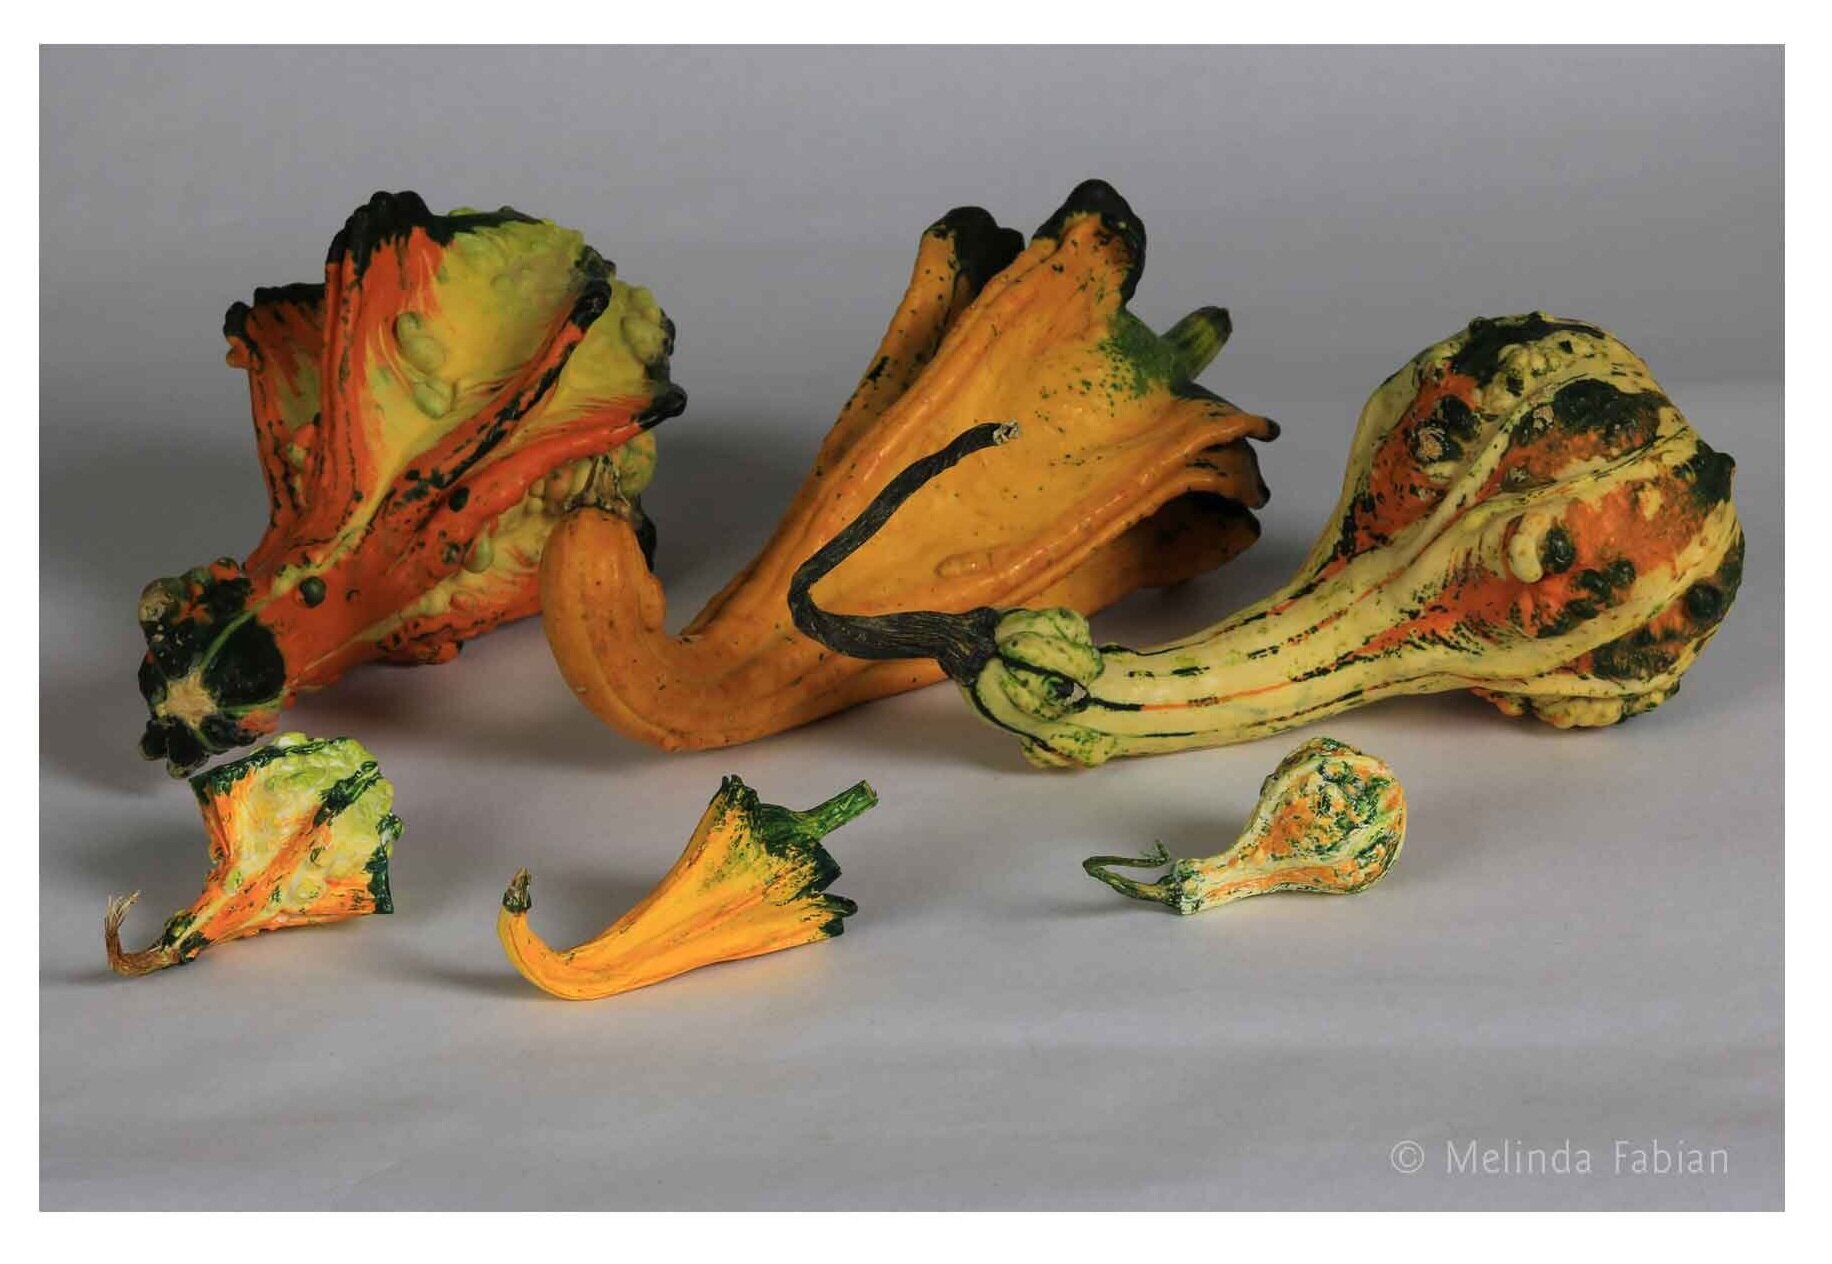
After purchasing many different varieties of gourds in all different shapes, sizes and colors, I had to narrow it down and decide which one I would try to mimic out of paper and paint. These are the three gourds I chose. I also decided to make them quite a bit smaller than the real-life gourds.
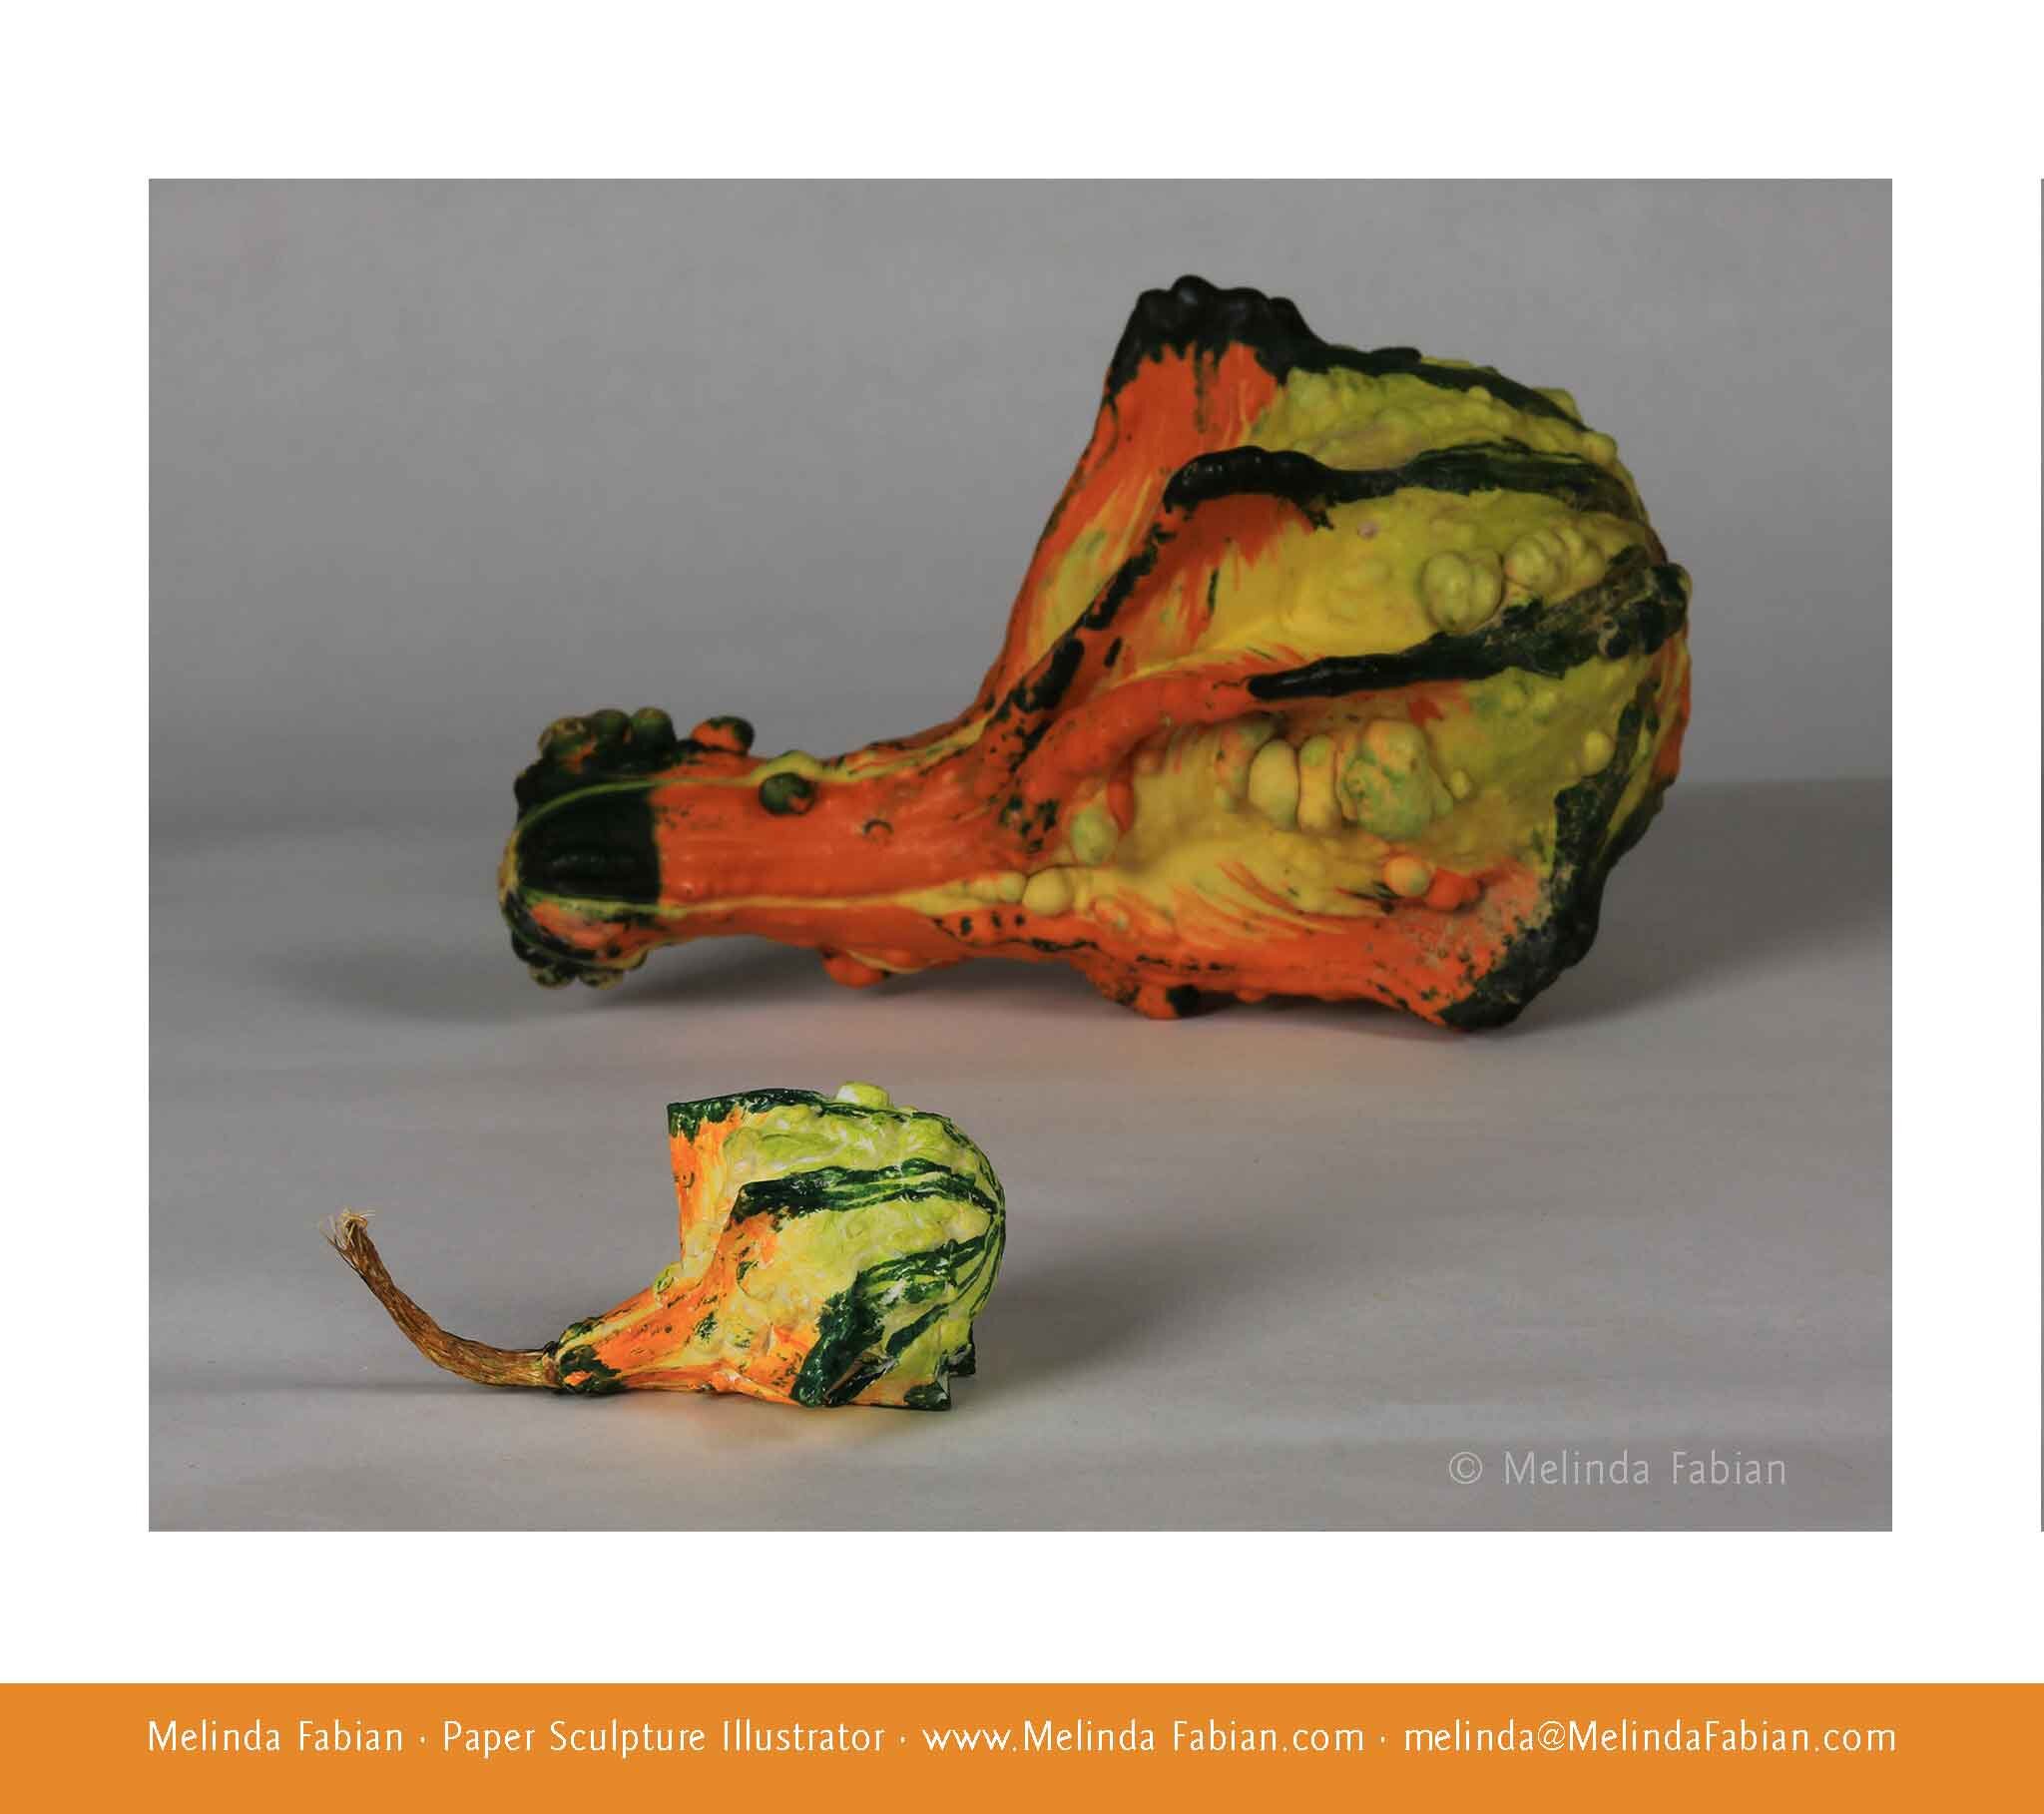
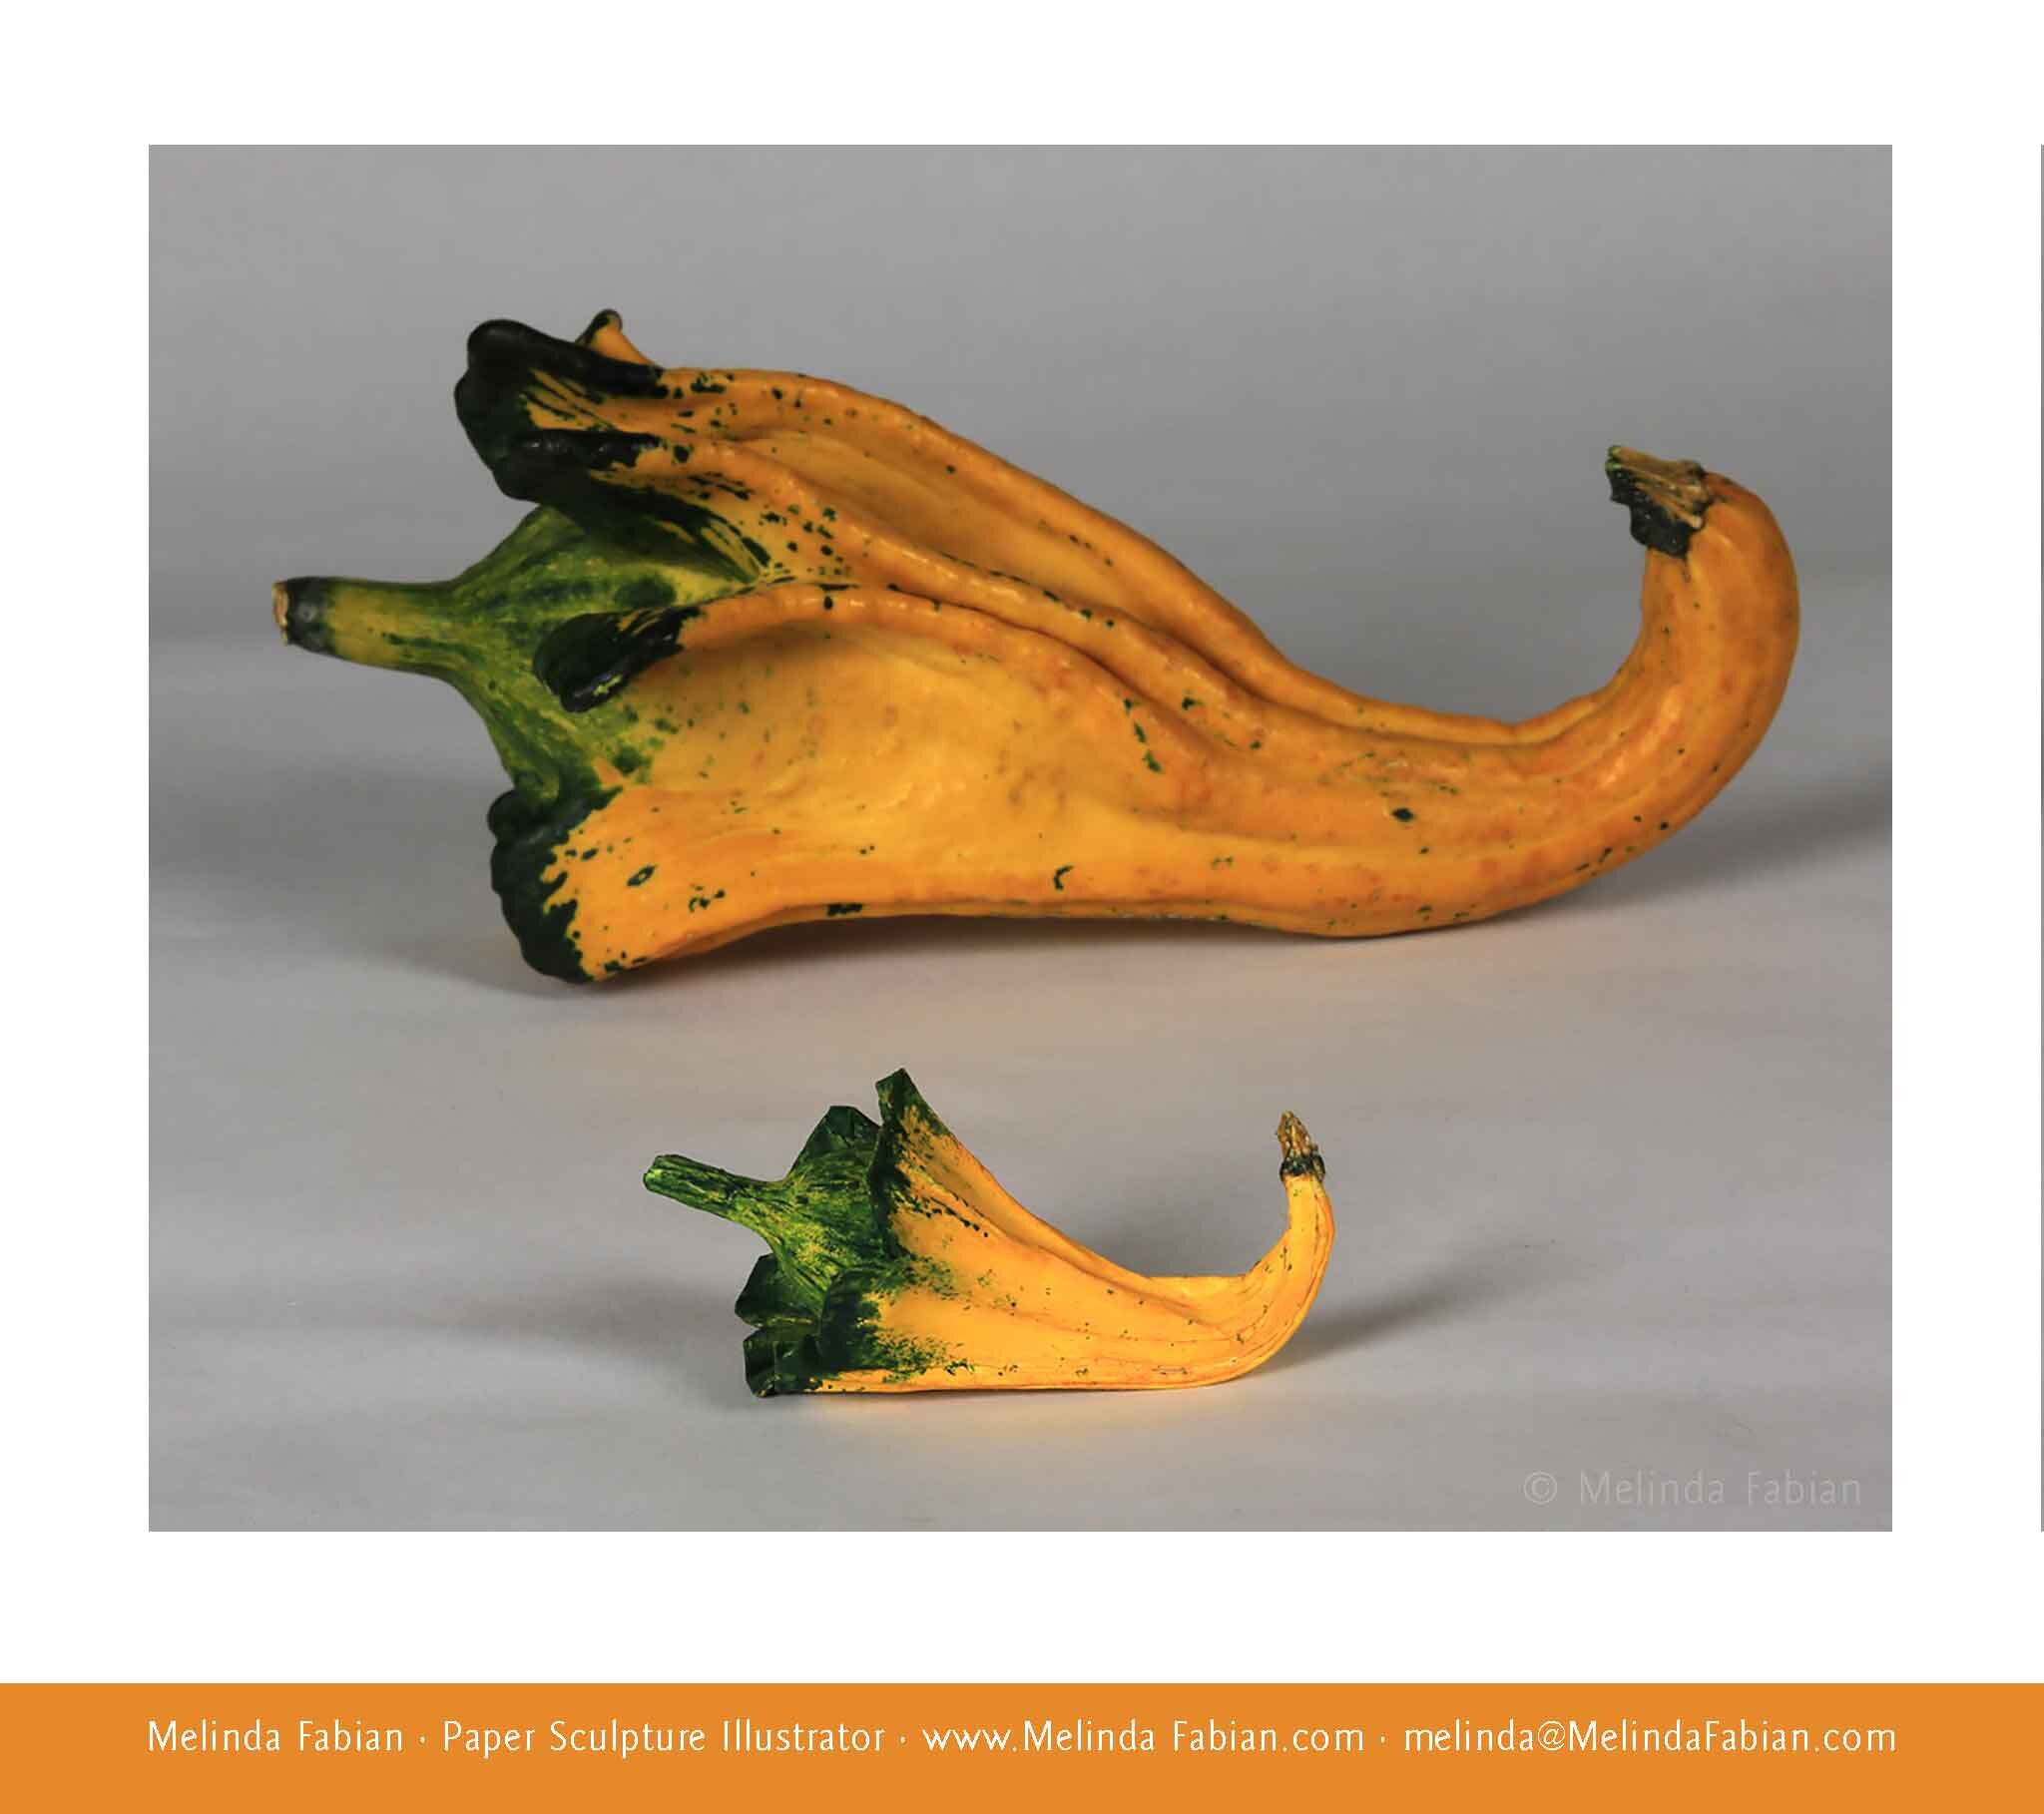
My favorite part of this design was adding the texture to the gourds — all those knobby lumps and bumps. I then painted the gourd after it was all shaped and formed to mimic the color of the ones I bought at the farm.
The paper sculpture that was the most challenging to make was the smoothest-looking gourd of the three. That surprised me as I thought it would be a breeze to make that one: Just glue down some paper, add some paint and it is done. But for some reason, it took some trial and error and many re-dos to get the smooth surface of the gourd correct. It kept getting lumpy and the seam where the two ends of the paper met kept showing up in an obvious way in all the wrong places. The trick is to hide your seams when you paper sculpt so that is doesn’t give your “secret” away that it is just made out of paper.
This trio of gourds was a fun project to do and I especially like hearing people be so surprised to discover they are paper gourds and not real gourds. The photos show the real gourd next to the paper gourds, which are completely three-dimensional and made entirely out of paper that I painted to give them a realistic look.

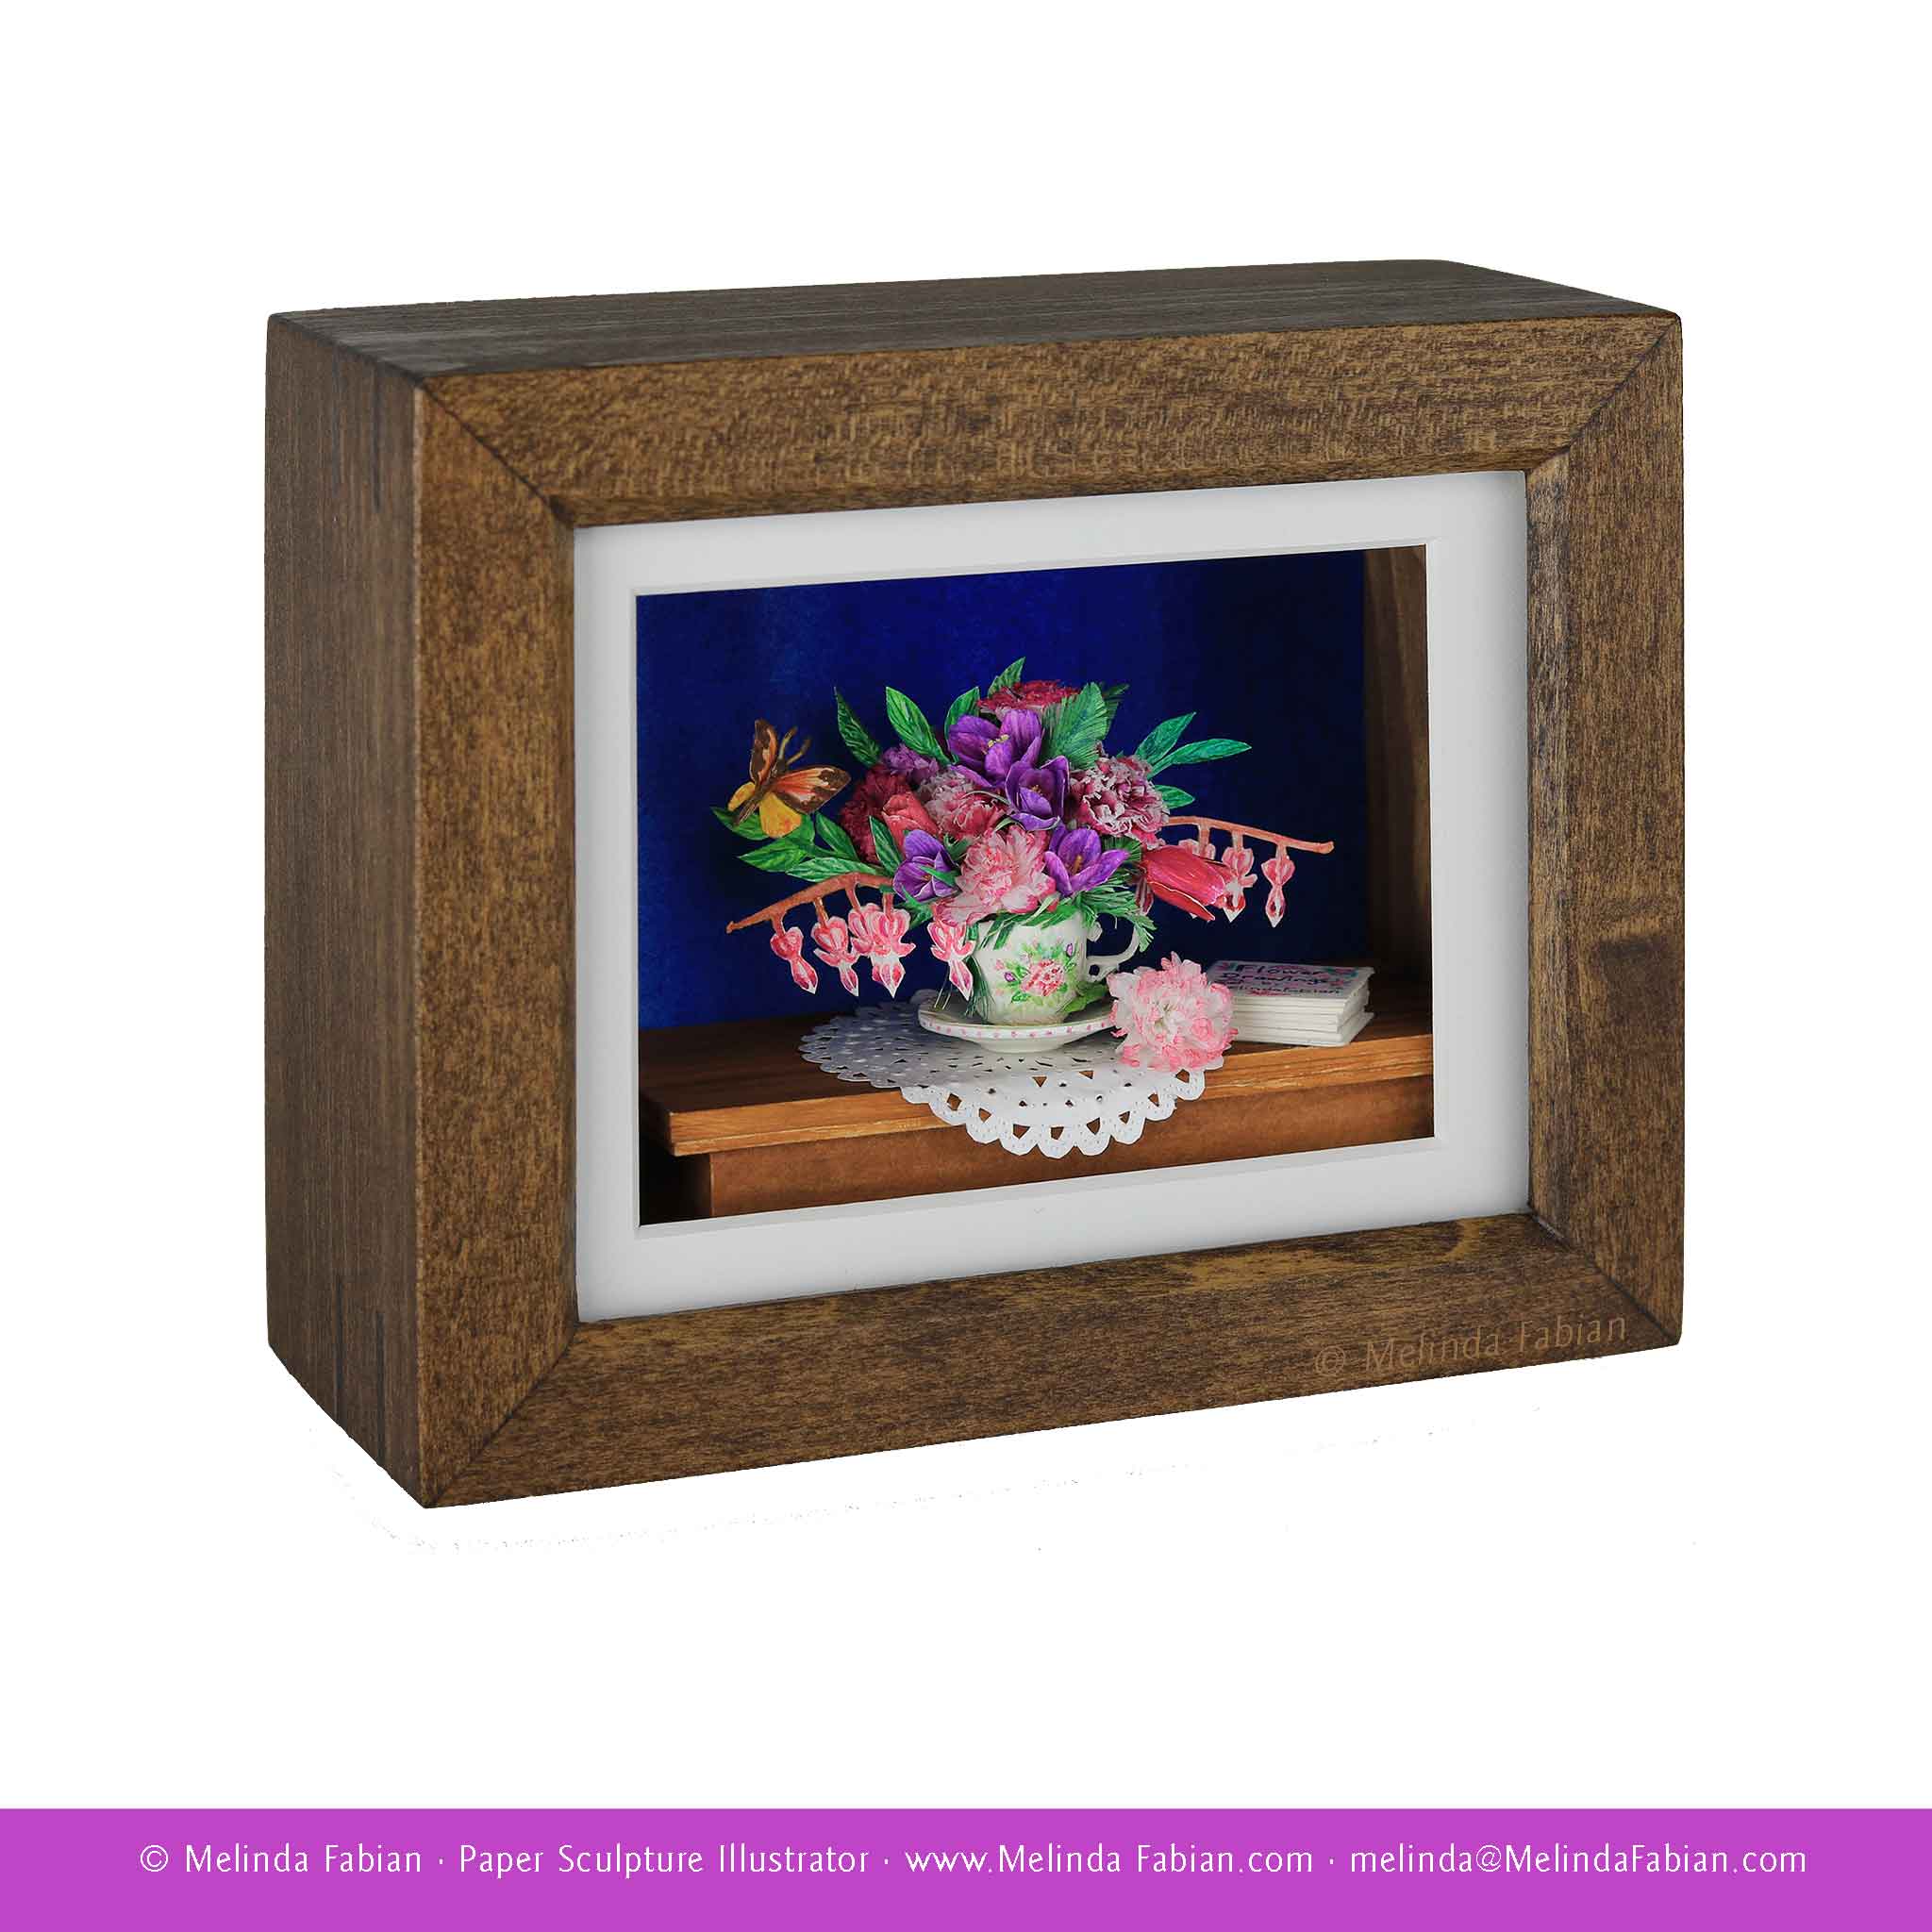
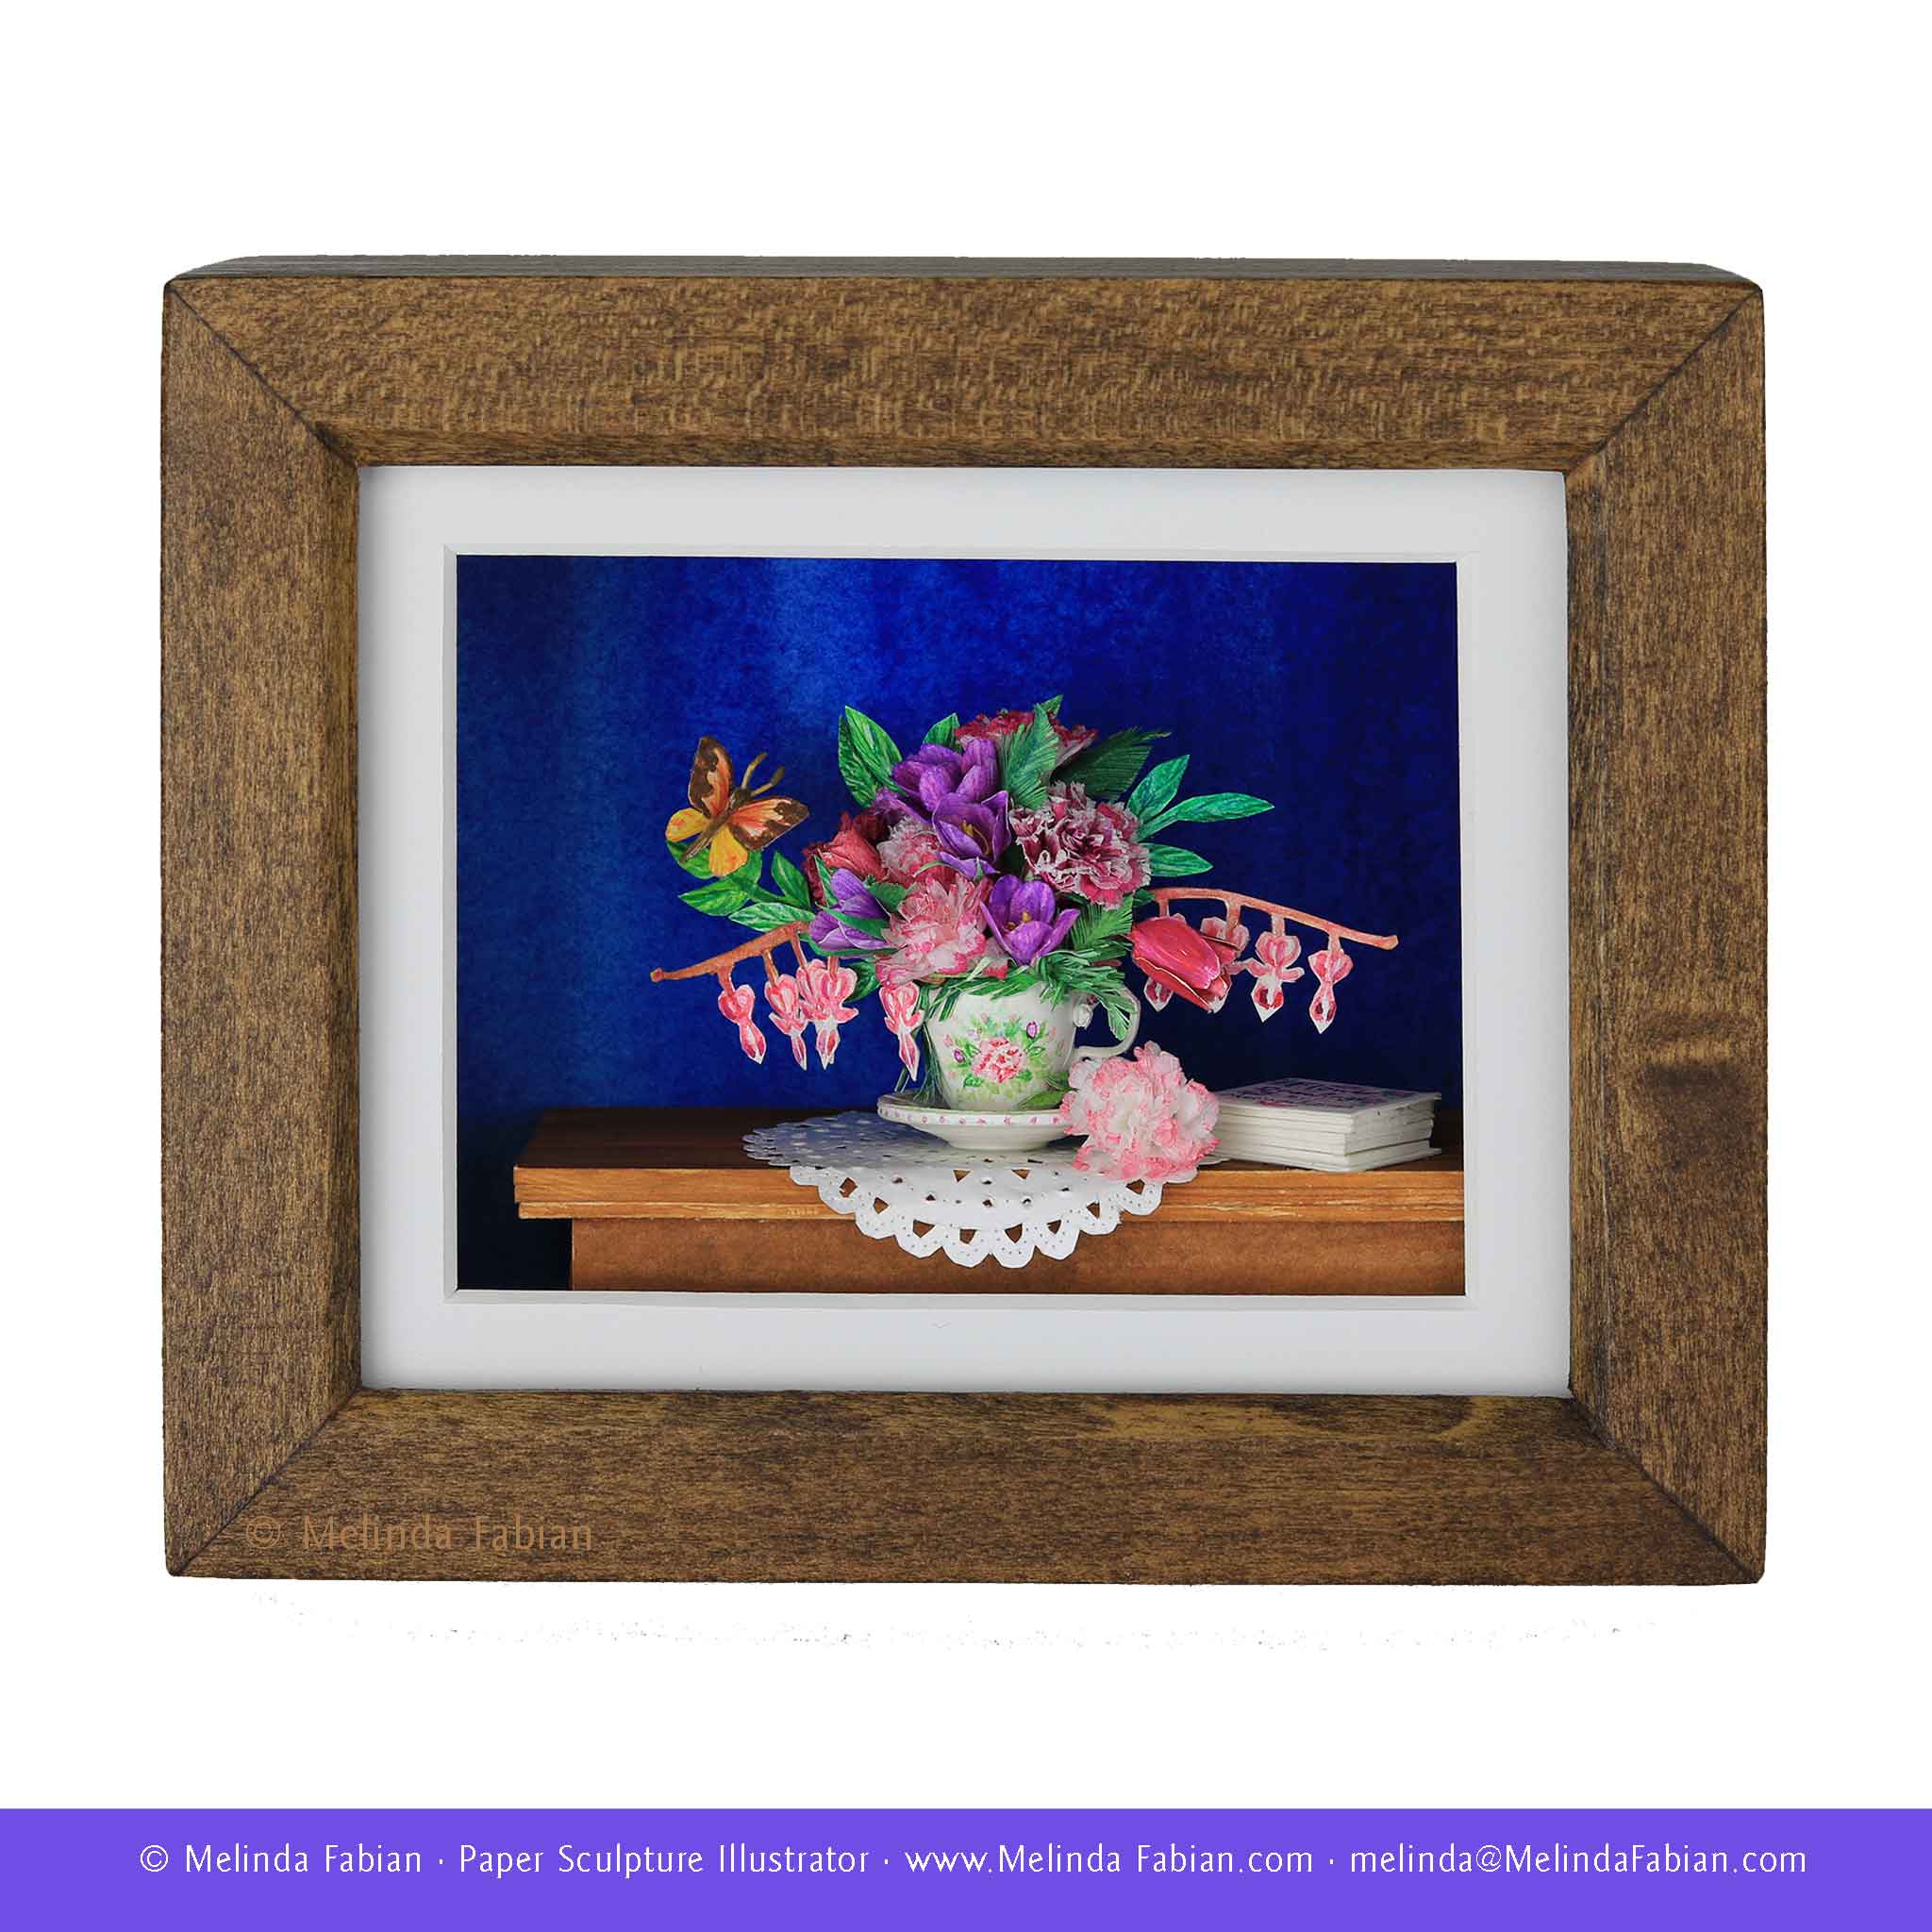
Artwork Feature: Delicate 'Teacup in Spring' Ready for Tea Time
“Teacup in Spring” is framed in a hand-made, custom wood frame and the image is only 3.75” x 2.75” x 1.25” deep.
I love beautiful flowers in pinks and purples, butterflies and antique teacups. Influenced by botanical art, beautiful decorative floral wall art, and the Dutch floral artists of the 17th century, I felt inspired to combine all of my favorite elements into one 3D paper sculpture, titled “Teacup in Spring.”
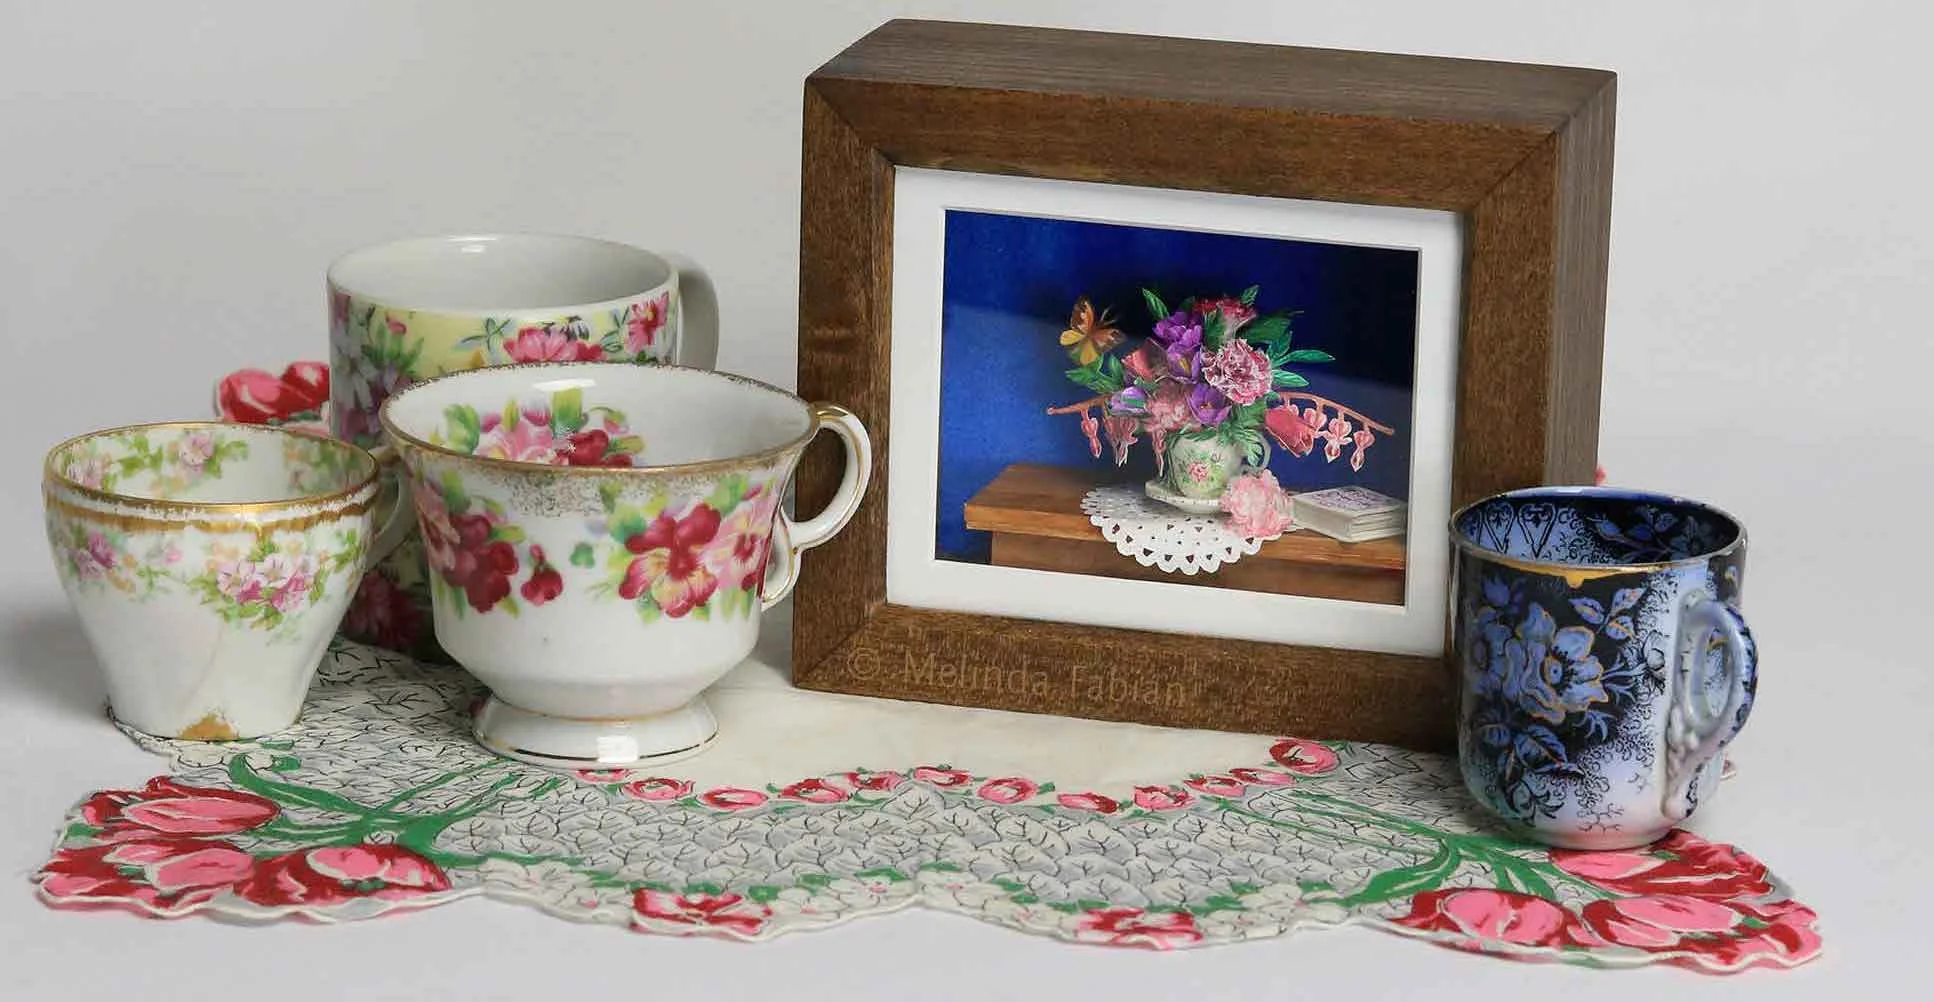
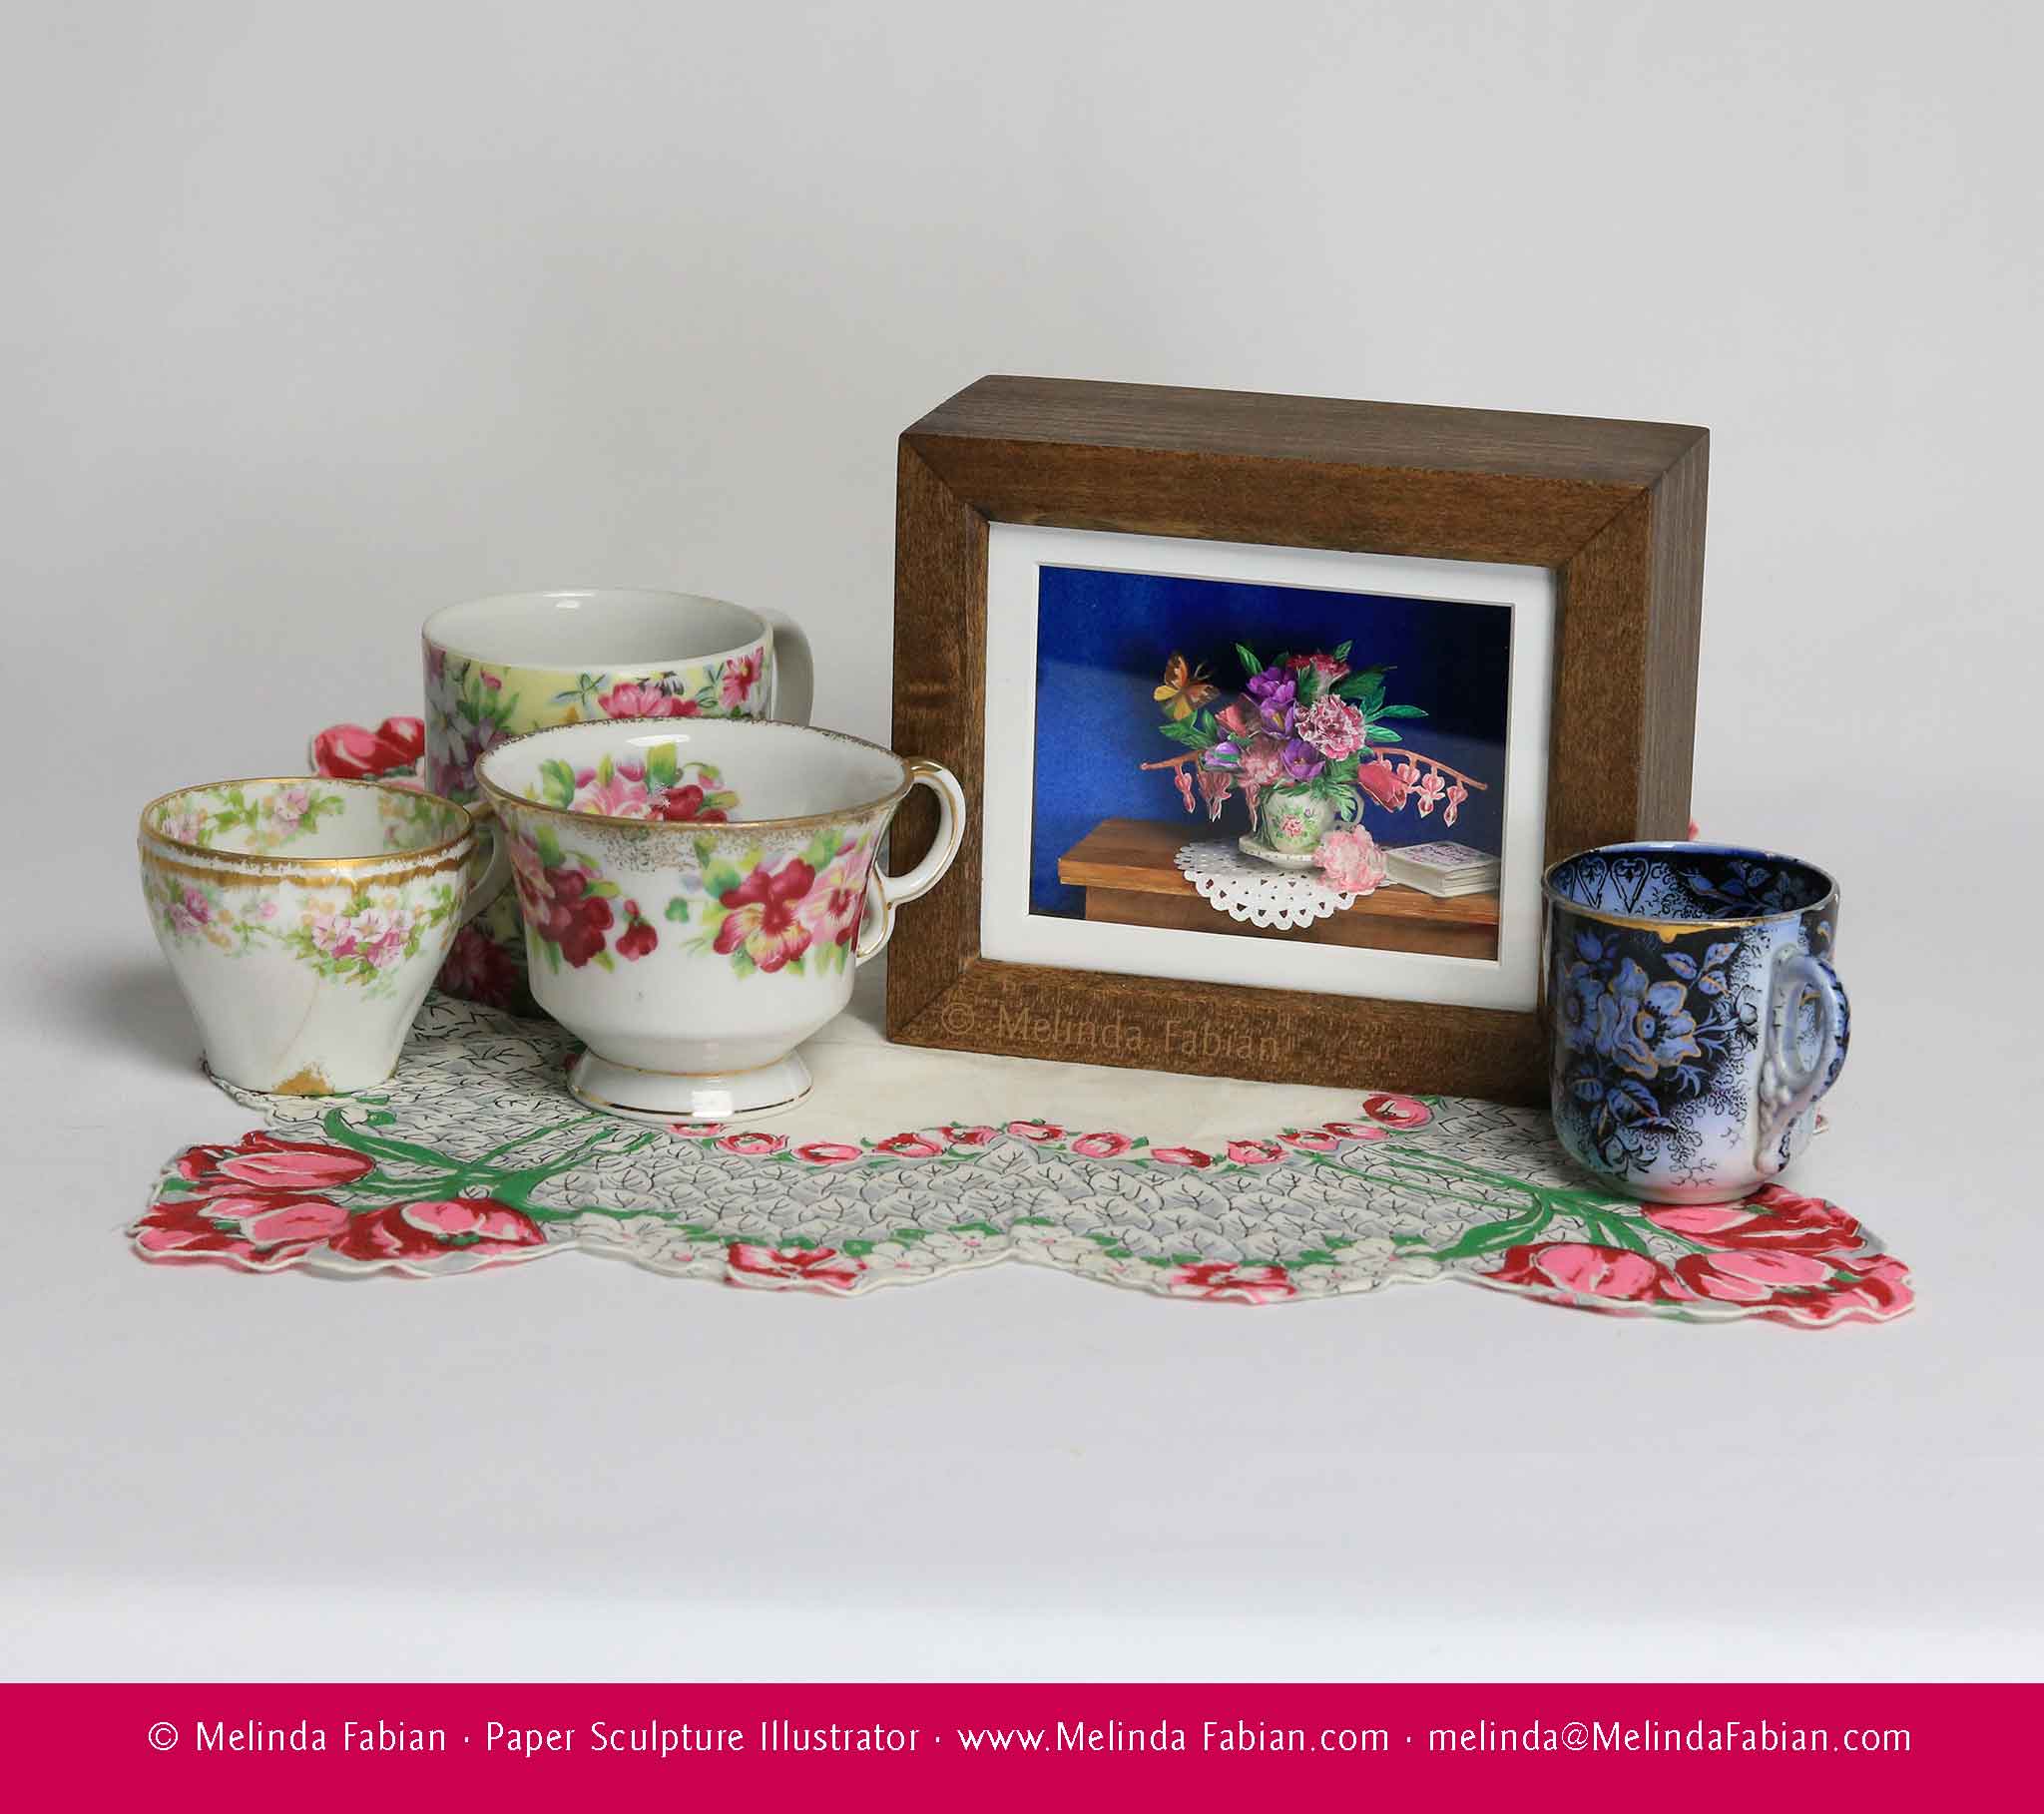
I like the shapes of antique china teacups, which are typically decorated in delicate floral motifs. I am drawn to the intricate shapes of the teacups and the flowers on the hand-painted teacups. I liked the idea of combining the teacup with a flower bouquet and of course, there had to be a butterfly that just happened to be visiting this spring bouquet.
The entire paper sculpture design is all created out of paper and paint. I took a photo of “Teacup in Spring” next to some antique teacups for size comparison. “Teacup in Spring” is framed in a hand-made, custom wood frame and the image is only 3.75” x 2.75” x 1.25” deep.

Creature Feature: Octopus Wants You to Catch If You Can
“Catch Me If You Can,” is one of my latest paper sculpture designs, a clever octopus made completely out of paper, even the suckers on its eight tentacles.
I have many ideas of different paper sculptures I want to make — sometimes I want to make them because it sounds like it would be fun to make. Flowers are a personal favorite, or a little furry animal because creating the fur out of paper is both challenging and rewarding when the finished piece looks like fur. Then I feel I was successful at mastering that.
Sometimes I have so many ideas, i have a hard time choosing something. That is what happened with “Catch Me If You Can,” a clever octopus made completely out of paper, even the suckers on its eight tentacles. When I was deciding on a new project, I rattled off a handful of ideas to my daughter and asked her what I should do next. She chose an octopus!
What a challenge it was figuring out how to make the suction cups on the tentacles. It did take quite a bit of trial and error until I figured out exactly the right technique to make and attach all those tiny little suction cups to the octopus. Happily, I figured out a way to do just that out of paper and I think it all worked out rather well.


Artwork Feature: Let the Artwork Fun Begin!
The inspiration for this artist’s box came from my memories of when I received my first wooden art box as a kid.
Looking through an artist’s wooden art box is like looking through treasured gifts. The next in my series of paper sculpture designs on art supplies, the inspiration for this artist’s box came from my memories of when I received my first wooden art box as a kid.
When I was 10 or 11 years old, my mom signed me up for art class. I started taking art classes from a local artist who also taught lessons on Saturday mornings to kids in her converted studio space in her basement. In the first couple of classes we started out drawing with charcoal, which I thought was so messy.
Then, we moved on to pastels and within a few weeks we started painting in oils. I was really excited the day my art teacher told me I could start working in oils. I couldn’t wait to be working in oils because that is what my oldest sister painted in.
It wasn’t too long after that when I received my very own wooden art box for a present. I was so thrilled! A wood art box — just like my sister had! Just like a REAL artist. It even had some new tubes of paint and a couple of brushes, a canvas and a pallet knife. My sister gave me a couple of her old used brushes as well.
I was so excited to have my very own art box, and it stayed with me for a long time as I started my professional art career. My original wood art box even went along with me to college. I still have my wooden art box, although I no longer use it for oil paints.
When I decided to create a paper sculpture of a wooden artist box I decided I wanted to fill the box with lots of art supplies. A wooden art box to an artist is like a treasure chest. You can’t wait to dive right in and check out all those cool new supplies just waiting there to be used.
Hopefully when you peer closely into the resulting piece, “Let the Fun Begin!,” it captures that beginner’s mind spirit — you can hardly wait to start having fun with all those new colorful art supplies stored in your wooden art box. In my paper-sculpted art box, even the “wood” box is made out of paper.


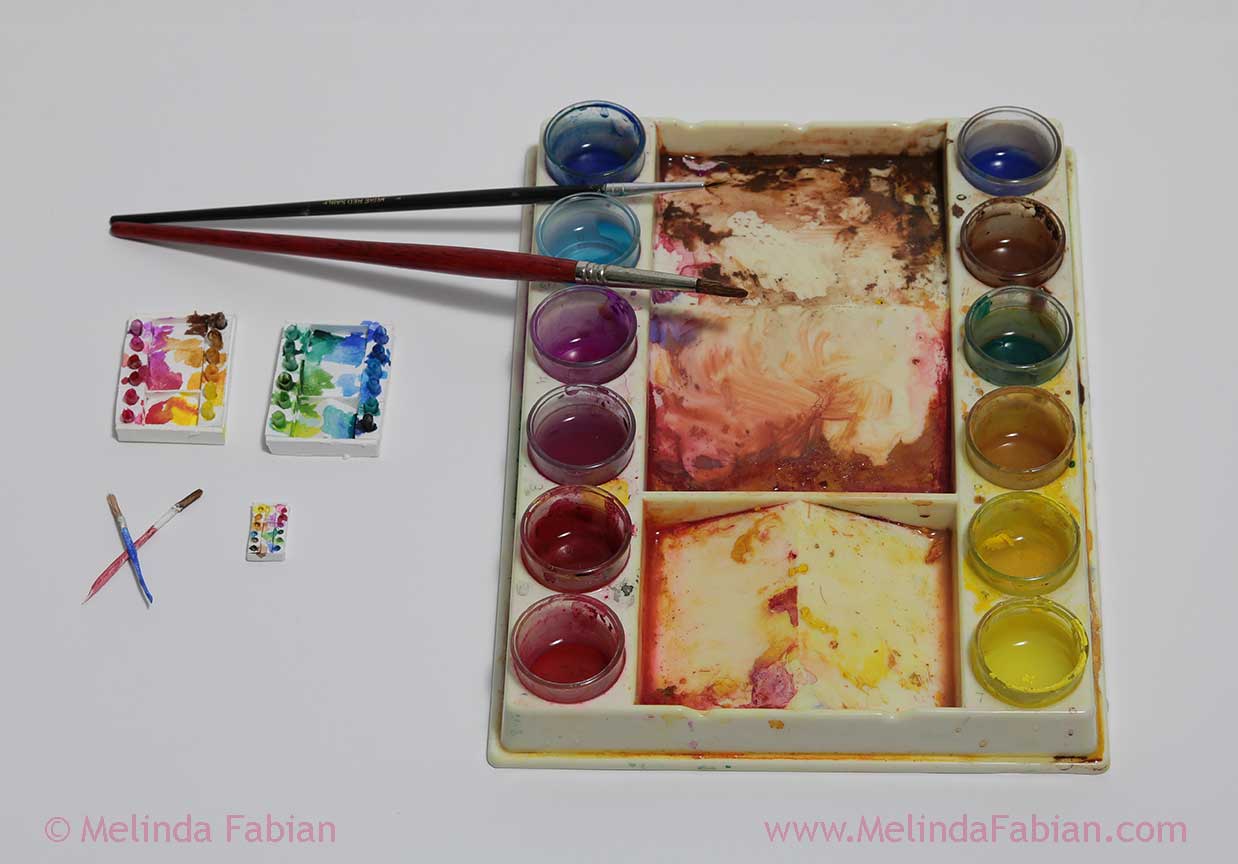
Artwork Feature: Art Supplies 'Color Wheel'
Take a look at the second paper sculpture design in my series on art supplies.
I’ve been working on a series of paper sculpture designs featuring art supplies. The first in the series, “The Paper Painter” featured a play on words and white paint tubes, some of my favorite art supplies to sculpt.
In the second of the series, I wanted to make another round paint tray and paint tubes but this time in color. The composition reminds me of a color wheel. I wanted the scene to look as though the artist is in the middle of painting.
I don’t know about other artists, but I always have to lay out my colors in the same order each time I paint. The yellows are always in the same cup, next to the reds, etc. The vibrant colors right out of the paint tubes always look so clean and colorful, but then the real fun begins — mixing together all those beautiful colors to create even more colors and a vibrant palate full of possibilities.
For added interest in this piece, which I have titled “Color Wheel,” the paintbrush and the tube of paint are actually sticking up in the air, as though the artist is in the process of using them.


Transforming 'My Studio' Into a Lifelike Paper Sculpture
I’ve been working on a design concept for a series 3D paper sculptures around habitats, and the first one I’ve created is “My Studio.”
I’ve been working on a design concept for a series 3D paper sculptures around habitats, a detailed representation of real-life environments made only out of paper and painted with watercolor and gouache.
The first habitat I’ve decided to sculpt is… me! Or I should say the place where I can be found 8, 10, 12 hours most days of the week — in my studio. Here’s how I made an exact replica of my desk completely out of paper.

To make my personal habitat, I started by making my desk and chair and then added in the accessories. There are a lot of accessories. “My Studio” is a representation of my art desk — pencils, paper and paints. It is also representing a part of me, much like my art. So, in this first habitat, the items are both literally on my desk or representative of my life.
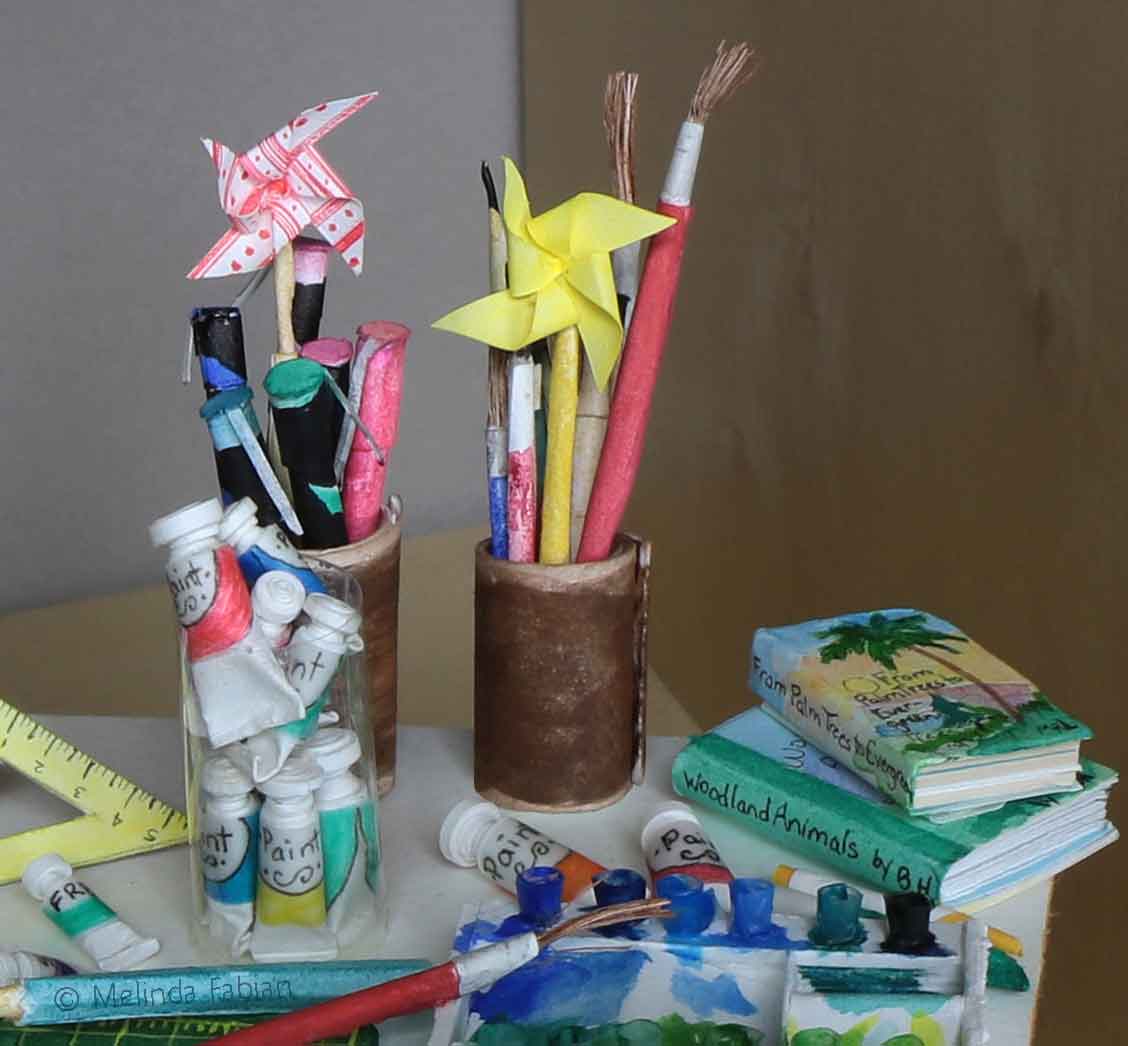
For example, when I am working on a paper sculpture, you will find me surrounded by books that I use for reference materials. In “My Studio, you’ll see stacks of books but they’re made-up titles and images that have a special meaning or are symbolic to me.
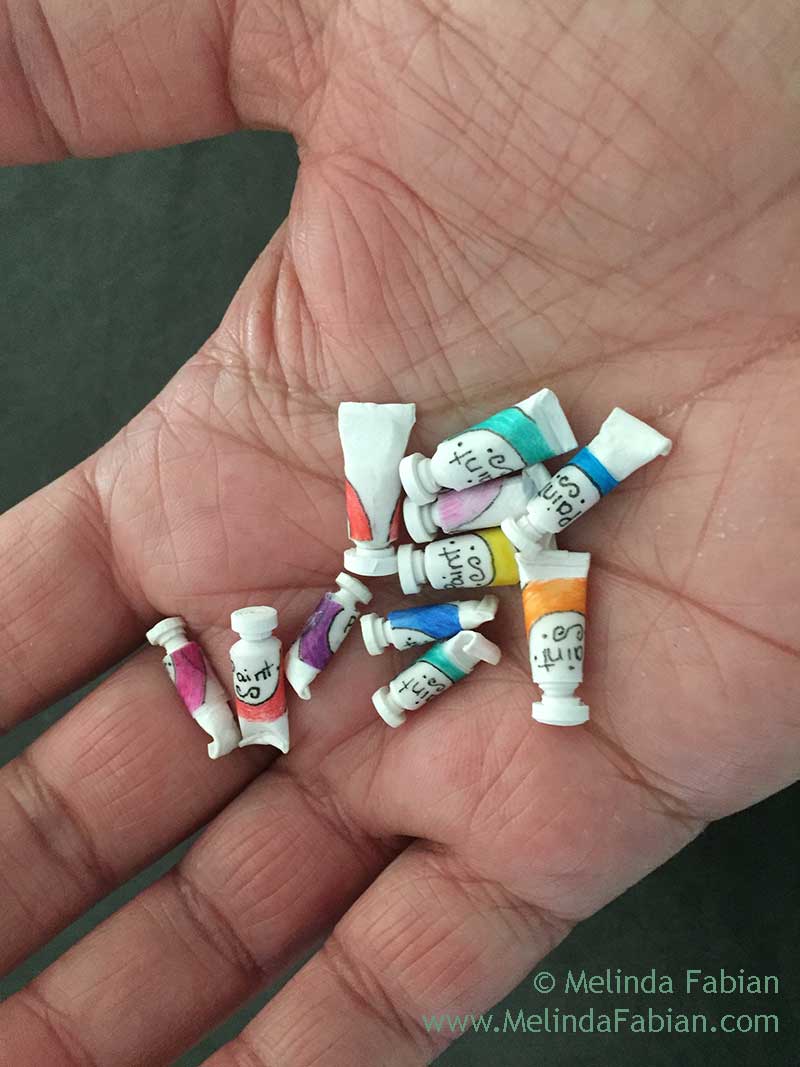
Then there are the clay containers of brushes, pencils and markers. My sketchbook, scissors, rulers and pencils are always nearby my desk too. Mini tubes of paint, brushes and even my little kitten are on top of and surrounding my desk and are all hand-sculpted out of paper. And, of course, don’t forget the paint trays. These are just my basics.
On the shelves next to my desk I have dark brown handmade clay containers, the ones I made in a pottery class during my college days. They hold markers, pencils and miscellaneous items too. Of course, there a few favorite family photos, drawings and mementos nearby as well.
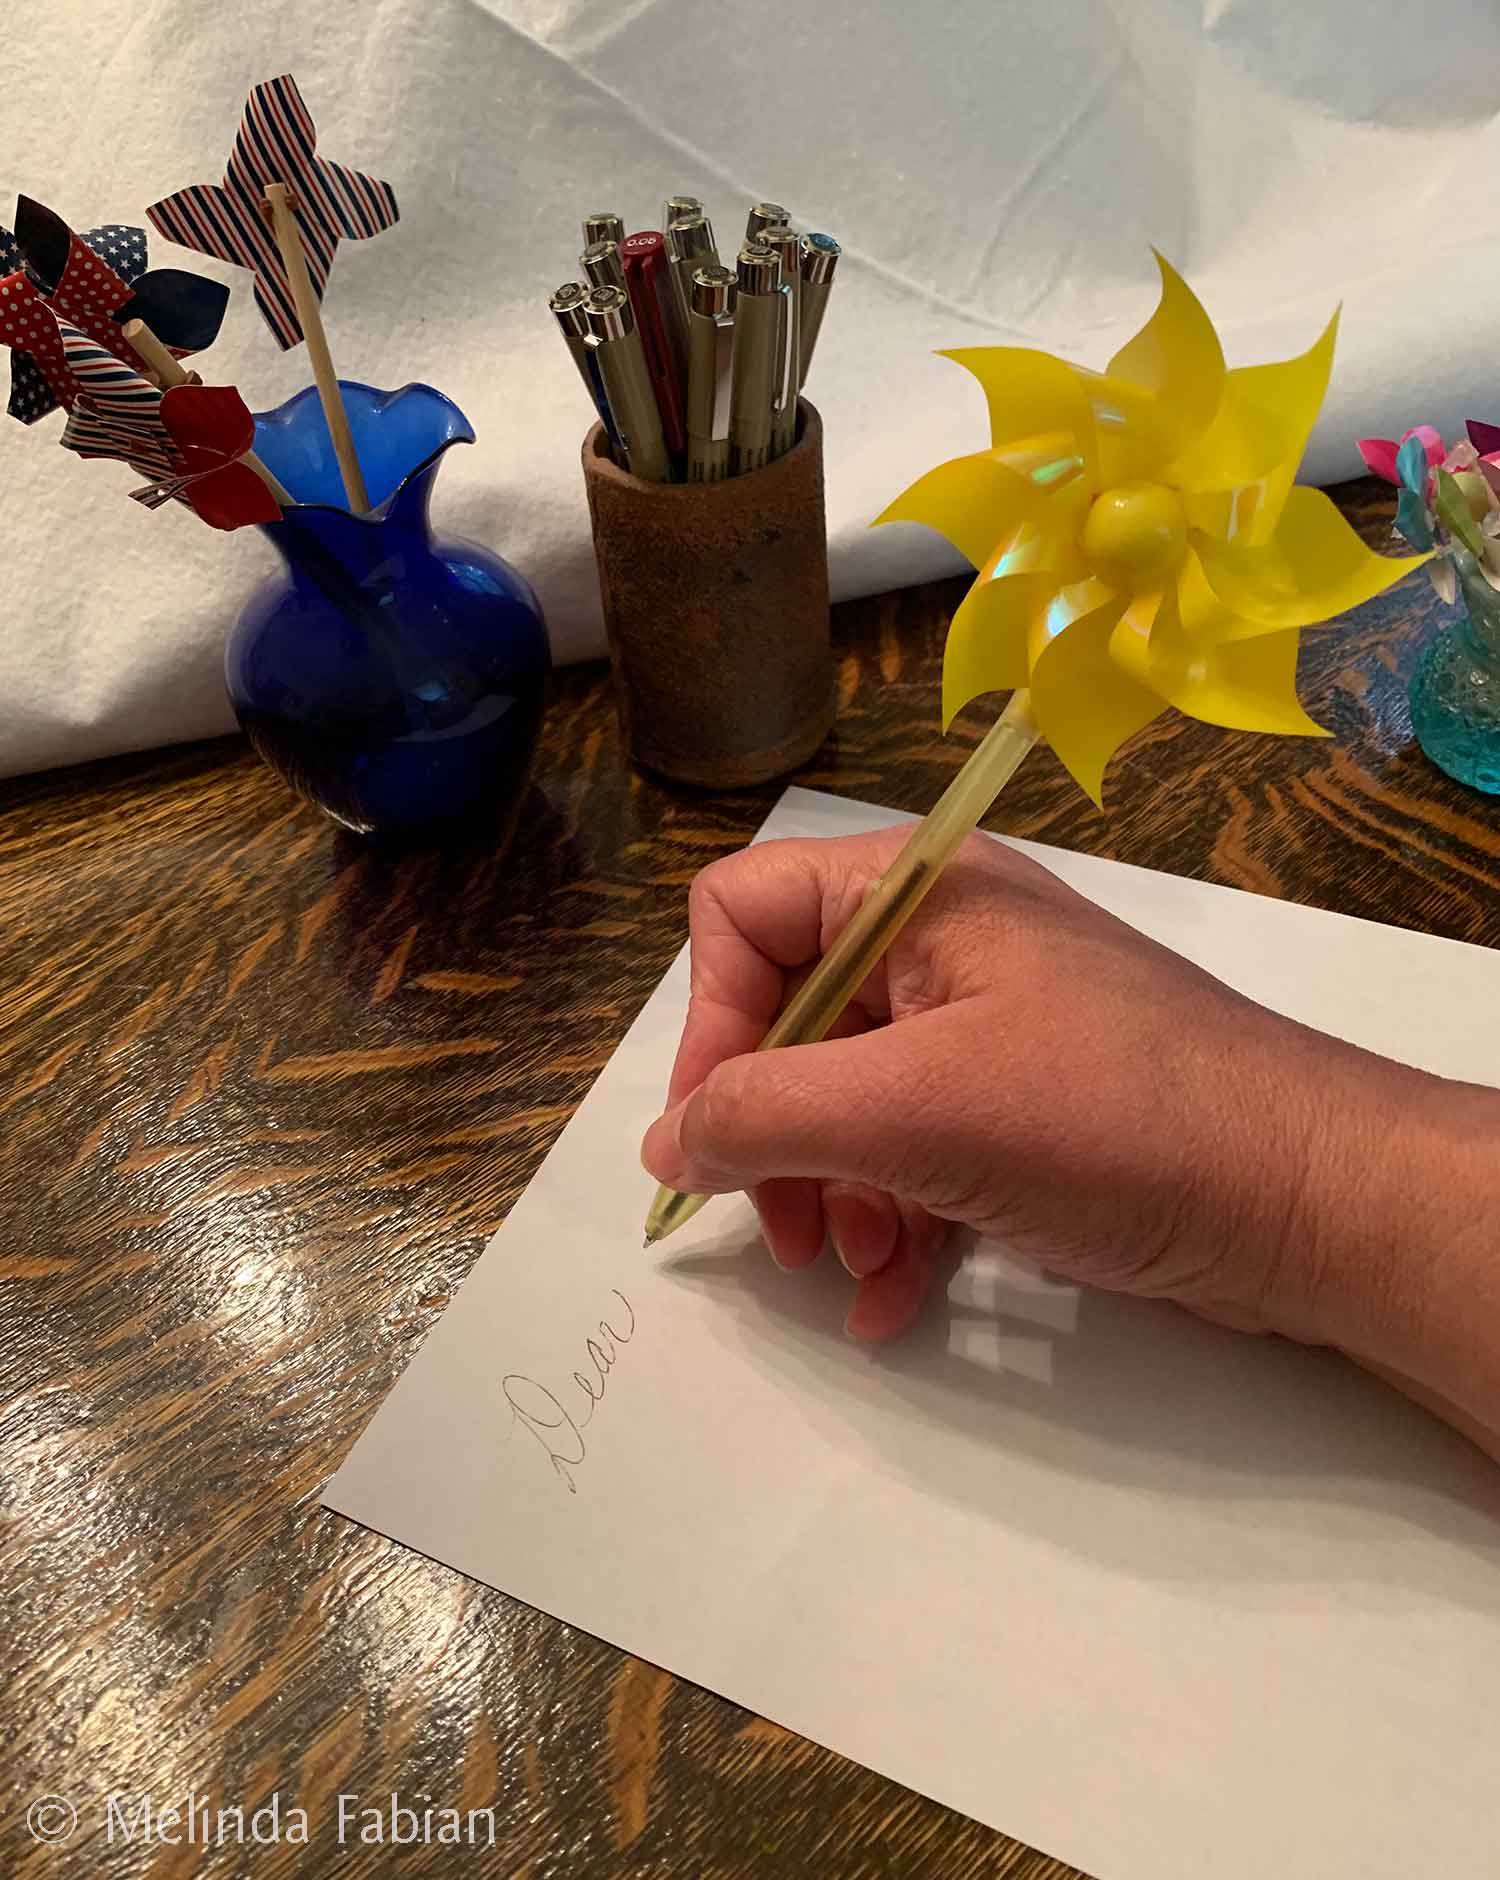
Did I mention the pinwheels? My studio would not be complete without a couple pinwheels. I have a yellow wind-up pinwheel pen, a personal favorite, and a vase or two on shelves nearby filled with pinwheels in bright colors.
Why pinwheels, you ask? I don’t know — they just make me happy because they are colorful and whimsical. (Everyone starts laughing when I bring out my yellow wind-up pinwheel pen and start writing.) I just have a few represented in the “My Studio” paper sculpture.
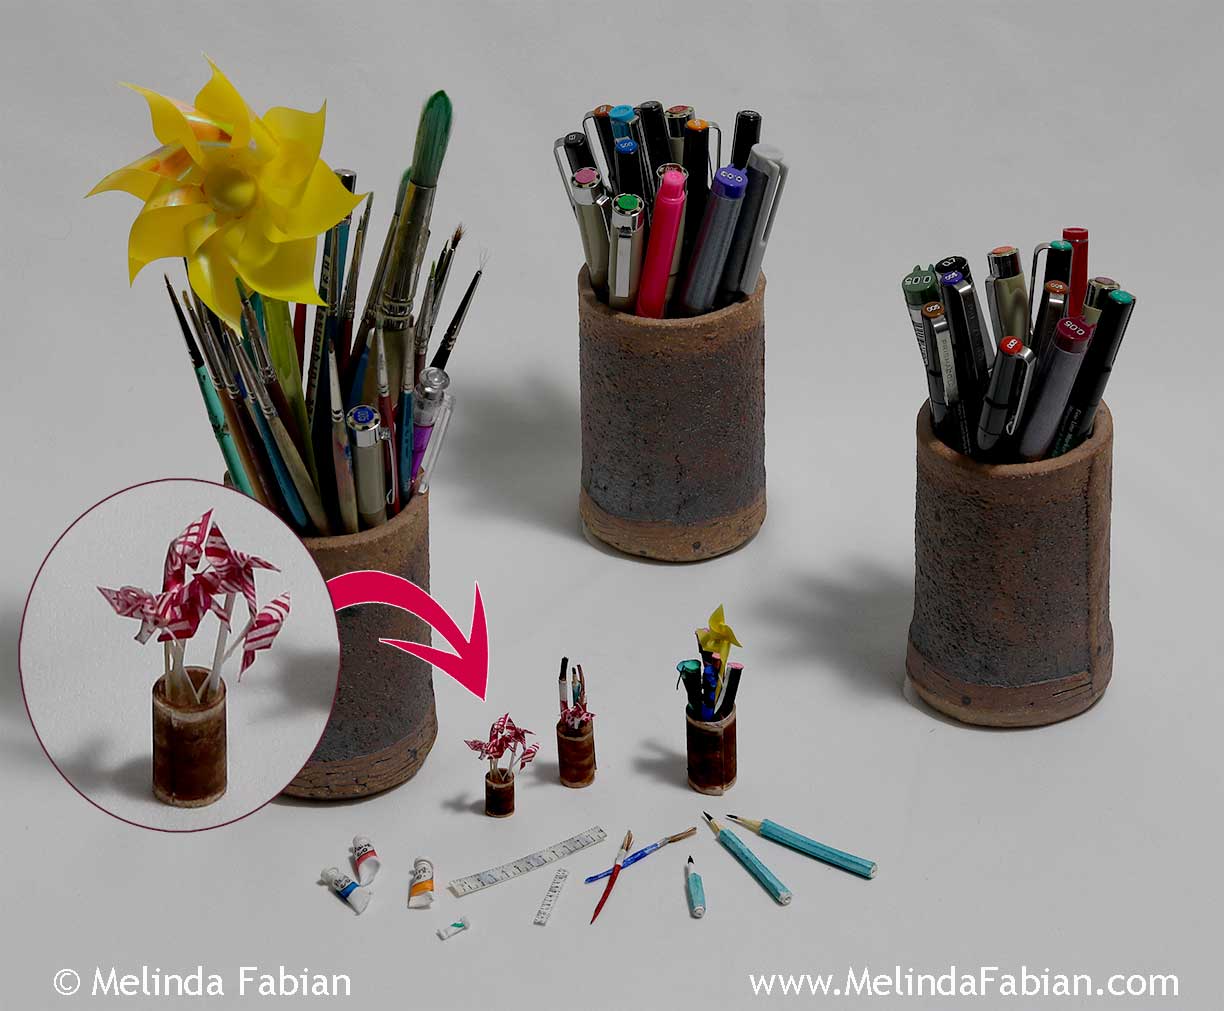
If you look closely, you might also notice there’s another miniature desk and chair in “My Studio” to represent the habitat I was creating.
Now that you’ve seen close-up photos of the parts and pieces of my paper sculpture habitat, “My Studio,” here is a final look of the completed piece — complete with the artist in her studio.


The Process of Bringing 'PAPER' to Life as a 3D Sculpture Illustration
Melinda Fabian outlines the process for creating her marketing paper sculpture design, "“PAPER.”
As a self-employed illustrator, I have to continually market my work. One of the ways I do that is to come up with creative ways to show people my paper sculptures, which is a medium and style that is a little unconventional. I want to convey to people quickly that it is something different and exciting and explain to someone in a visual way what my illustrations are. I also want to demonstrate to a potential client how I can solve a project and what medium I use to illustrate it.
This whole process of coming up with marketing materials is similar to being in college, and being assigned your next project by an art teacher. Except now, you come up with your own assignments for your marketing and advertising needs and figure out the goal, the problem that needs solving and the parameters you have to stay within.
So, with this marketing assignment, I want to use the final image on all of my social media sites and also on a postcard to market my paper sculpture illustration business to art directors. The problem is, how can I quickly portray my paper sculpture medium and my process to someone unfamiliar with my work? How can I demonstrate that I can help solve a publication's needs?
My concept was to create a one-word sign appropriately titled PAPER. I could show a progression beginning with a simple, plain white piece of paper and end up with a fully illustrated 3D paper sculptured letter. Using just one word will quickly explain my process visually and I will also be able to show different ways of visually and graphically communicating a solution to a publication's message using my medium, paper sculpture.

Here is my thought process for each of my paper sculpture letters:
Just like the way I work in paper sculpture, the first letter of the sign ‘P’ is just a plain white piece of paper — nothing fancy, just a basic letter cut out of a flat sheet of paper.
For the letter ‘A,’ I wanted to show the beginnings of a transition to manipulating the medium, using a small scissors to cut out the plain paper to make a box letter ‘A,’ cutting, bending and shaping the paper to transform it from a flat sheet of paper to a simple 3D form — just the basics.
This is where the real fun begins — the second letter ‘P.’ I wanted to highlight the transition from materials into a project. You see the little scissors in the previous step. But now, as things start to get more complicated, I need my pencils to sketch with, my paper, paint brushes, a paint tray, and paint. I also like that each one of these items begins with the letter ‘P,’ which was a fun added bonus. This is the first letter of the sign where each of the objects are a more advanced 3D paper sculpture, all made out of paper. The shapes all work together to form the letter ‘P.’
Next up, the transition from white paper to the painted paper. For the letter ‘E,’ I started with the stark white paper sculpture flowers, which can be very beautiful all on their own in white. But, I wanted to show that these flowers transition into realistic full-color flowers.
Lastly, my favorite, a completely painted 3D paper sculpture letter that completes my PAPER sign. The heron, turtle and little red birds (all words that have the letter ‘R’ in them) all surround this tree and create the letter ‘R.’ It was a challenge to figure out how to create the letter ‘R’ using those critters, and I think I successfully solved that tricky situation. The letter comes across as an ‘R’ and is clearly legible, which is so important when creating decorative lettering.

“The letter comes across as an ‘R’ and is clearly legible, which is so important when creating decorative lettering.”
I feel that my paper sculpture sign has successfully fulfilled the requirements of my assignment and I accomplished all of my goals that I originally set forth — to visually explain what it is I do and demonstrate that I can help communicate any message for a publication's needs.